Tag Archives: Study notes

4. Understanding a range of specialist elements in the establishment of garden and urban plantings

This unit provides an understanding of the opportunities that exist for the use of specialist elements in the planting of a variety of gardens, including urban and amenity green spaces.

Understand the design principles and practices of using amenity bedding schemes.

1.1 Describe the design principles and practices used in amenity bedding schemes.

RHS description of bedding schemes

1.2 Review the spacing requirements of spring and summer bedding plants including bulbs.

Chionodoxa Blue Giant, Iris x germanica, Trillium cuneatum, Muscari armeniacum 5cm
Allium, Crocosmia ‘Lucifer’, Crocus, Hyacinthus orientalis ‘Blue Basket’, Narcissus poeticus, Tigridia 10cm
Lilium, Osteospermum jucundum, Celosia ‘Fresh Look Mix’, Lobelia erinus, Tagetes patula, Viola × wittrockiana, Lobularia maritima, Zinnia elegans ‘Dreamland Series’, Tulipa ‘Little Beauty’ 15cm
Fritillaria, Callistephus chinensis, Begonia semperflorens, Iberis sempervirens, Solenostemon scutellarioides ‘Wizard Series’, Centaurea cyanus, Dianthus barbatus, Rudbeckia hirta, Nicotiana sylvestris, Petunia hybrida, Phlox paniculata, Salvia roemeriana 20cm
Gaillardia ‘Arizona Sun’, Coreopsis grandiflora, Cosmos atrosanguineus, Dahlia ‘Garden Party’, Pelargonium x hortorum, Impatiens Accent Series, Capsicum annuum, Verbena ‘Lawrence Johnston’ 25cm
Alstroemeria , Canna, Musa basjoo 30cm

1.3 Produce a work schedule covering a 12-month period for a situation in 1.1.

For a summer bedding scheme

  • December – draw up plan and estimate numbers.
  • January – order plants; sow seeds under glass; take cuttings of overwintered perennials.
  • February – March – care for seedlings and cuttings; watering; P+D monitoring; potting on.
  • April – once chance of frost as passed, harden off plants.
  • Start of May – cultivate bedding area, treat perennial weeds and incorporate fertiliser.
  • May – mark out, place plants, plant, mulch, water.
  • June- October- water, weed, deadhead; feed in July, high potassium feed.
  • October – remove plants, pot up perennials to over-winter.

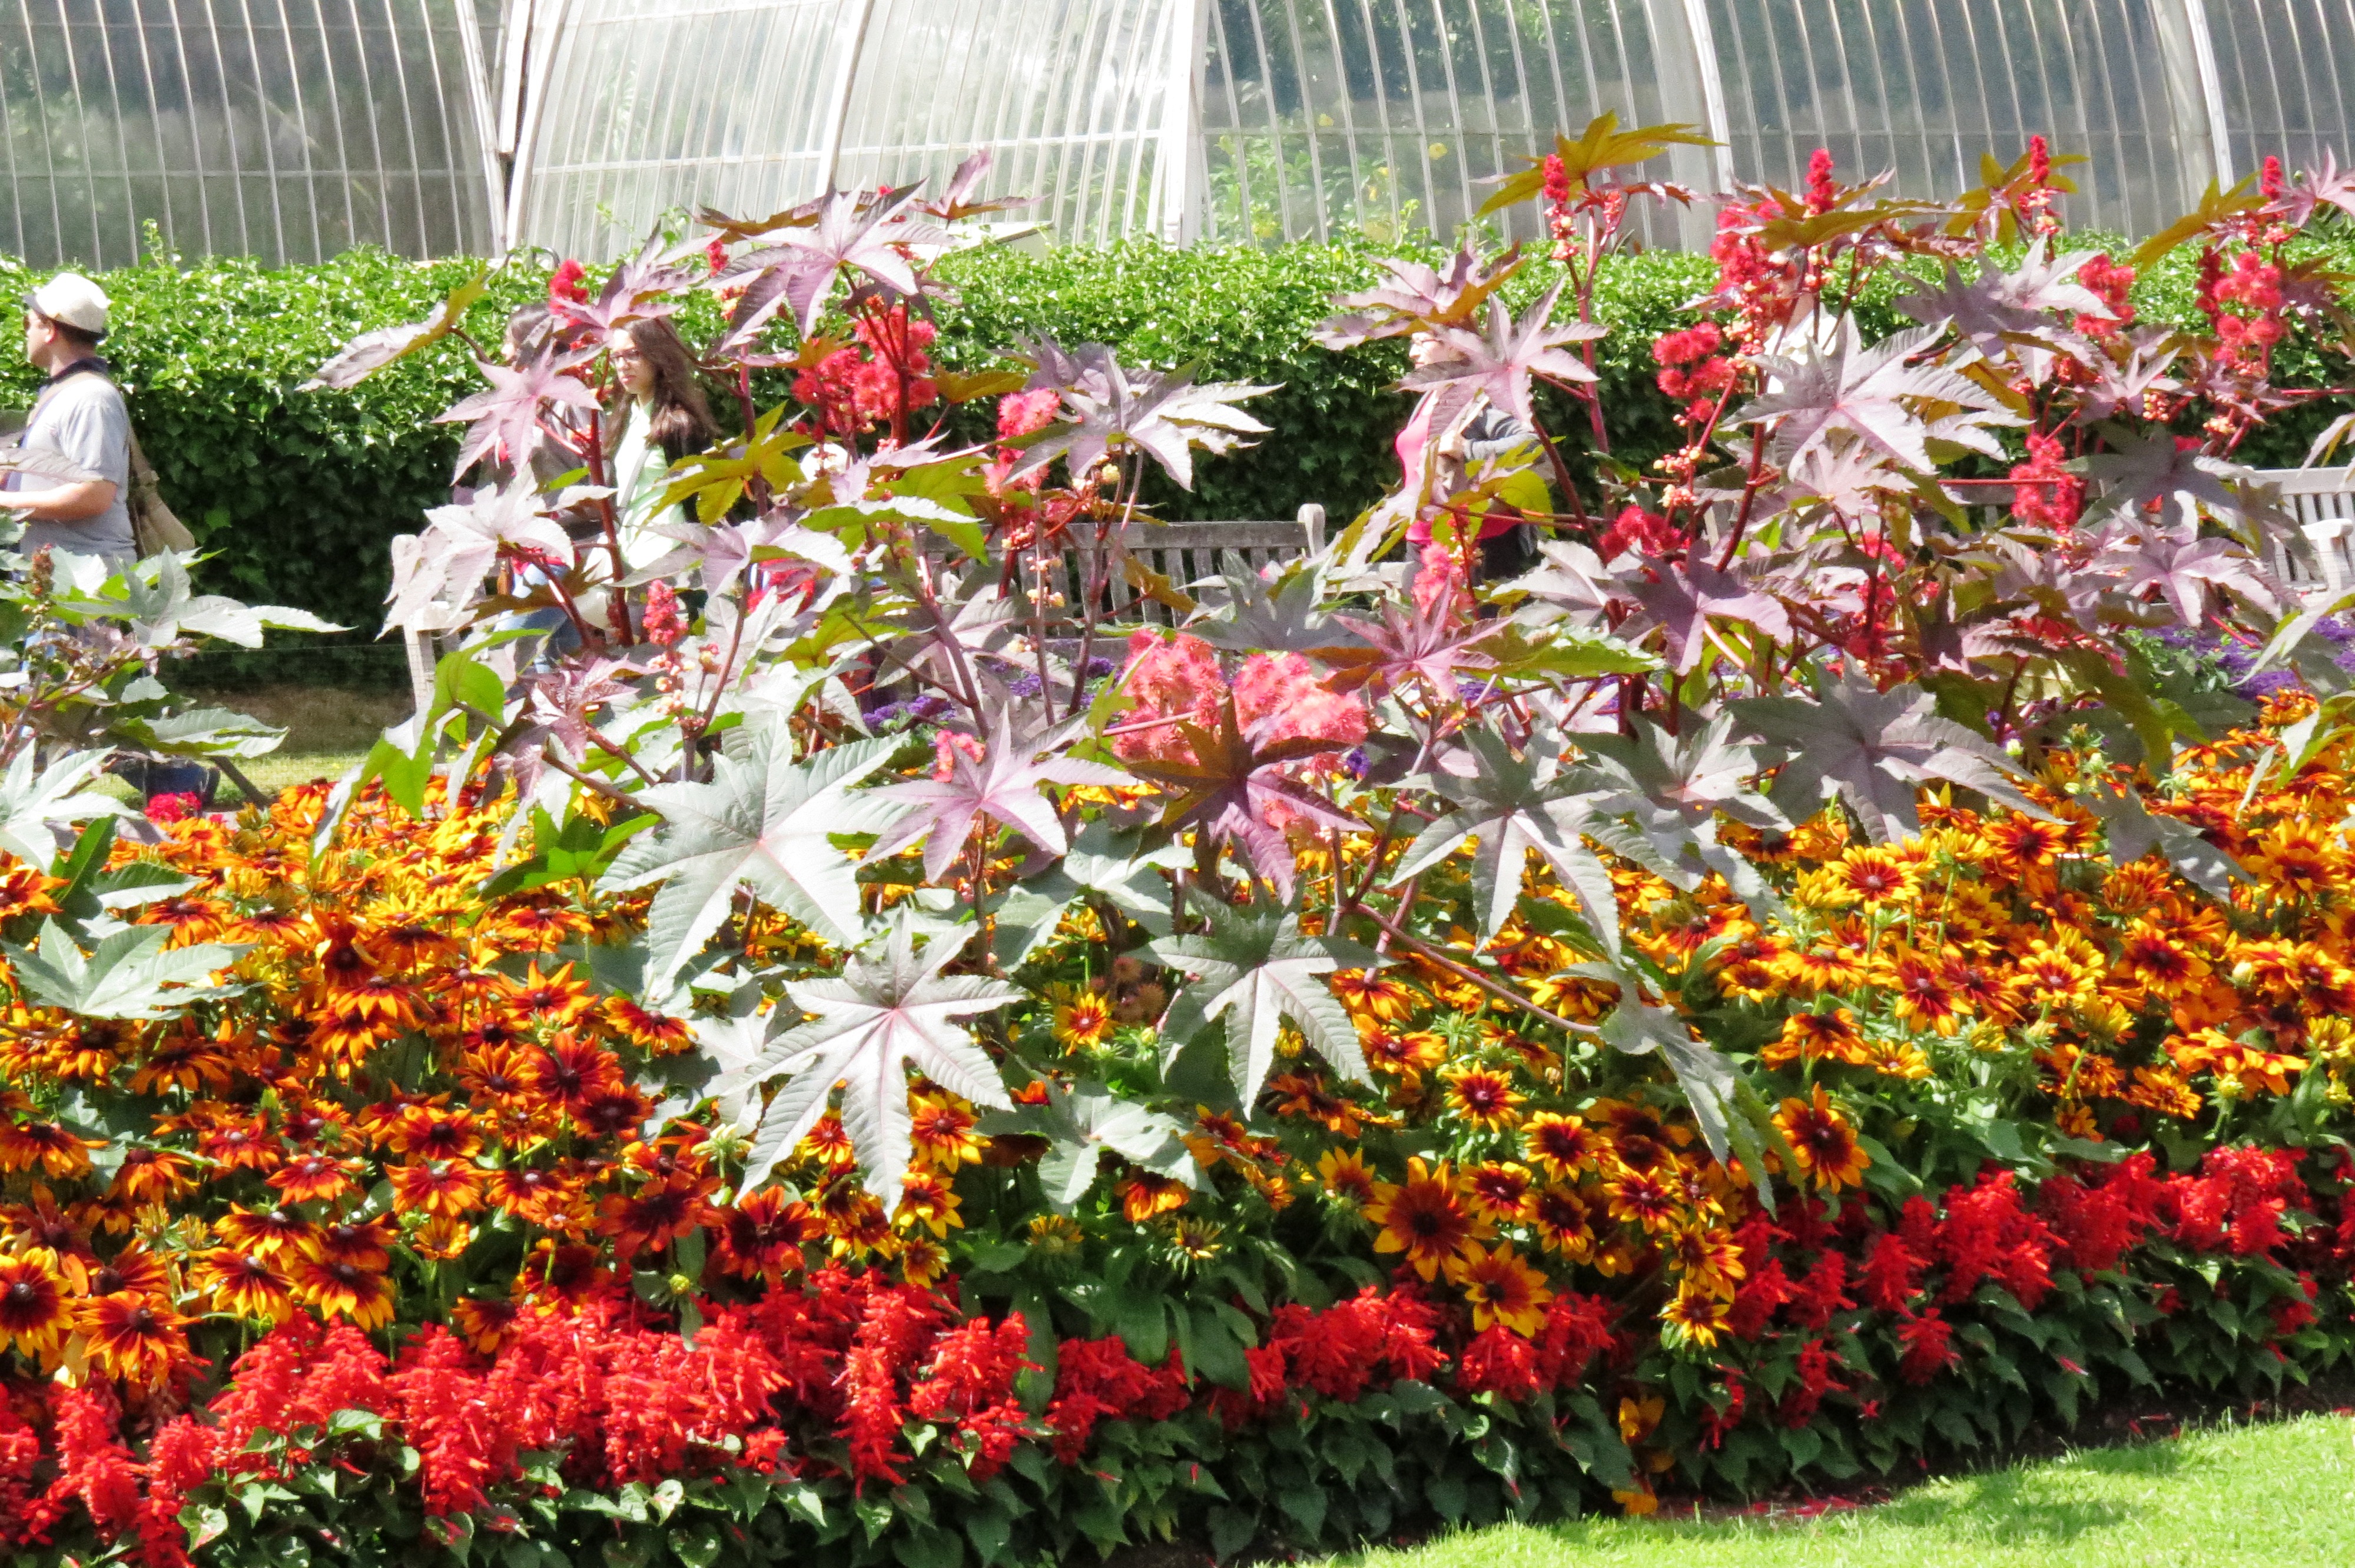
1.4 Describe specialist forms of bedding scheme, including carpet, three-dimensional and subtropical.

Carpet

Carpet bedding uses low growing, brightly coloured plants close to each other so that they knit together to create a carpet effect, it is intensive, using a lot of plants. It often involves using geometric designs, logos, words, coats of arms or floral clocks. Possible plants are rosette forming succulents like Echeveria or mat forming Alternanthera, also Saxifraga, Sedum and Sempervivum.

Three Dimensional

May use similar plants to carpet bedding since these can grow diagonally or vertically. A frame can be used in the shape of an animal or a pyramid, with plants then attached.

Some examples here

 Subtropical

Subtropical bedding uses exotic tender plants, usually with large or coloured foliage. Musa basjoo, Canna Tropicana, Solenostemon and Amaranthus caudatus are good examples of subtropical plants.

 2. Know the typical components of a range of specialist garden areas.

2.1 Describe the typical elements (including plants) of the following specialist areas: woodland; wildlife; sensory; low maintenance amenity; grass or steppe (prairie); and potager.

Woodland

A garden with a number of natural layers, canopy, understorey and ground level, the canopy is formed by trees, the understorey with shade tolerant shrubs and the ground level consists of low growing plants that either tolerate shade or make use of winter and spring when leaf cover is less dense and light can reach the plants.

Plants

Canopy – Fagus sylvatica or Quercus robur in natural woodland; or use more ornamental planting such as Betula pendula or Prunus serrula for trunks and winter interest.

On the woodland edge, where soil is neutral or acid and shade is dappled, it is possible to grow Acer palmatum, Hammamelis mollis, Rhododendron germania or Magnolia grandiflora.

Understorey – native shrubs like Ilex aquifolium, Sambucus nigra, Ruscus aculeatus. Lonicera periclymenum or Parthenocissus tricuspidata can grow through trees.

Ground layer – mainly spring bulbs – Galanthus nivalis, Allium caeruleum, Narcissus ‘Tete a Tete’, Anemone nemorosa. Perennials – Brunnera macrophylla, Pulmonaria vulgaris, Helleborus niger, Epimedium perralderianum, Geranium macrorrhizum, Athyrium niponicum var. pictum, Dryopteris filix-mas, Arum italicum, Colchicum autumnale.

Wildlife

A wildlife garden is not simply a garden allowed to grow wild, but one specifically designed to encourage wildlife. A wildlife garden uses plants that grow well in the allotted position and therefore don’t need environmentally unfriendly additions, such as peat. A wildlife garden provides as many habitats for wildlife as possible.

Some features

  • Large habitats – pond, hedgerow, stand of trees, green roves, dry stone wall of local stone.
  • Small habitats – insect habitat box (habitat wall), stag beetle loggery, pile of logs, beehive, climbers.
  • Cultural – not clearing away weeds unless they are invasive, leaving leaf and wood litter around, biological controls (no pesticides), allowing moss and lichen to grow on brick and wood of buildings.
  • Plants – naturalised (or native) and happy to grow in the environment, with nectar for bees, berries for birds.
  • Plant species – Colchicum autumnale, Viburnum bodnantense, Campanula spp., Cytisus scoparius, Eschscholzia californica, Nepeta cataria (mint), Helleborus spp., Aquilegia vulgaris, Agrostemma githago, Geranium phaeum, Hebe spp., Sedum spectabile, Mahonia spp., Phlox paniculata, Calendula officinalis, Primula vulgaris, Kniphofia spp., Rosa canina.

Sensory

Sensory gardens can be to help people with disabilities enjoy gardens more or to encourage children to interact with plants.

Features – wheel chair access, sculptures, sculpted handrails, scented plants and herbs, thornless roses, water features. Noise can be created with wind chimes, running water and noisy plants. Care needs to be given that plants and hard landscaping do not pose any possible health risk to vulnerable users.

Very good article here – tips for disabled gardeners.

A website selling products for a sensory garden – lots of interesting ideas for kids gardens (not plants).

Plants

Colour

  • Helianthus annuus – bright yellow flower that can grow up to 30cm height in a week.
  • Calendula officinalis – bright orange flowers.
  • Houttuynia cordata ‘Chameleon’ – three-toned foliage that smells of lemon.
  • Heuchera ‘Chocolate Ruffles’ – purple leaves with brown undersides and pale pink flowers.

Sound

  • Briza maxima, an annual grass, flowers rustle in the wind.
  • Nigella damascena – bright blue flowers which form puffy seed-heads that rattle .
  • Miscanthus oligostachyus ‘Nanus Variegatus’ – striped yellow and cream bamboo-like foliage, rustles in the breeze.
  • Phyllostachys nigra – rustling foliage and stems that knock together.

Touch

  • Stachys byzantina -silky foliage.
  • Salvia argentea – cotton down covers foliage.
  • Phlomis fruticosa – soft leaves and stems.
  • Sempervivum ‘Commander Hay’ – Leaves are rigid and fleshy to the touch.
  • Drosera capensis – sticky carnivorous plant

Smell

  • Helichrysum italicum – curry-scented leaves.
  • Lavandula angustifolia ‘Hidcote’ – scented flowers.
  • Cosmos atrosanguineus – chocolate coloured, vanilla scented flowers.
  • Lathyrus odoratus – scented flowers.
  • Melissa officinalis – lemon-scented leaves.

Taste

  • Mentha spicata – mint.
  • Rosmarinus officinalis – rosemary.
  • Tropaeolum majus – leaves can be used in salad.
  • Allium schoenoprasum – leaves can be used in salad.

Low maintenance

A low maintenance garden may be one on a housing estate where gardeners are only employed to come a few times a year or for a private household where the owners don’t have much time to work in the garden. Disadvantages are that the gardens can be a little uninspired.

  • Grass – do without, reduce, have simple lawn shape (sweeping curves/minimal trees), use mowing strip to save time strimming.
  • Borders – ground cover or drought resistant shrubs, slow growing plants, 65-70% evergreen, bark chip to minimise weeding, species roses (don’t need deadheading or treating for disease).
  • Avoid containers.
  • Install automatic watering.
  • Minimal planting – gravel garden.

Plants

  • Grasses – Carex flagellifera, Uncinia rubra, Stipa tenuissima, Briza maxima.
  • Conifers– Thuja occidentalis ‘Smaragd’ (slow growing).
  • Shrubs – Ilex aquifolium, Buxus sempervirens (slow growing), Choisya ternata, Cotoneaster horizontalis, Pyracantha ‘Orange Glow, Vinca minor ‘Variegata’, Nandina domestica ‘Fire Power’.
  • Perennials – Acanthus spinosus, Epimedium grandiflorum, Artemisia schmidtiana ‘Nana’, Ophiopogon planiscapus ‘Nigrescens’.
  • Bulbs – Narcissus ‘Tete a Tete’, Galanthus nivalis.

Grass/Steppe/Prairie

Prairies are temperate grasslands usually found in the Americas. Steppes are found in China and Russia. Grassland maybe arid or temperate climate.

  • Prairie planting mimics the effect of prairies in the wild by using large groups of grass and perennials to create a dramatic effect.
  • Piet Oudolf uses prairie planting, some of his gardens – Pensthorpe, Bonn and West Cork.
  • Is a late season style – using late flowering perennials mixed with grasses, plants that die well
  • 3 types – dry, mesic (somewhat moist) and wet. Mesic and dry prairie plants need loose soil with good drainage. Wet species grow best in badly drained areas. Match plants to soil type.
  • Plant in curves, instead of rows, it will give you a more natural look.
  • Allow one species to dominate, then blend into another.
  • Prairies can be good for wildlife.

Article about prairies – with plants and tips.

Plants

Grasses

  • Calamagrostis x acutifolia ‘Karl Foerster’
  • Miscanthus sinensis
  • Miscanthus ‘Morning Light’
  • Miscanthus sinensis ‘Zebrinus’
  • Miscanthus ‘Ghana’
  • Pennisetum Orientale
  • Stipa gigantea
  • Stipa tenuissima

Perennials

  • Rudbeckia fulgida
  • Helenium ‘Moerheim Beauty’
  • Echinacea Sussex Prairie Seedling
  • Veronicastrum virginicum
  • Eryngium bourgatii
  • Asters novi-belgii
  • Veronicastrum virginicum ‘Diana’
  • Anemone x hybrida
  • Verbena bonariensis
  • Persicaria ‘Firedance’

Potager

‘Jardin potager’ was the French term for an ornamental kitchen garden, a decorative way of growing vegetables and herbs. Potagers took the neat rows of kitchen vegetables to a new level by planting in patterns, usually in a formal framework evergreen rather like a knot garden or parterre. Edible flowers and herbs, and non-edible companion plants or purely decorative flowers are planted with the vegetables. Plants are selected for usefulness as well as for colour and form.

While the aim is to have a very decorative and productive part of the garden, it is hard to combine these two objectives fully. For decorative ranks of plants like at Villandry, grow plants that hold their shape for a long time ( like cabbages and leeks), this is more decorative than functional. To have a really productive vegetable garden there needs to be a succession of a small number of each vegetable, so that not all lettuces are ready at once and so they can be harvested as needed. Decorative fruit and vegetable gardens, involving trained fruit, flowers and vegetables in a setting of formal beds – raised, edged with woven willow or hazel – are the most practical way to get the potager effect and still be able to use vegetables.

Plants

  • Globe artichoke (Cynara scolymus)
  • Ruby chard (Beta vulgaris)
  • Lavandula orientalis ‘Hidcote’
  • Verbena bonariensis
  • Runner bean (Phaseolus coccineus)
  • Allium atropurpureum
  • Helianthus annuus

Some articles on designing a potager and what plants to use:

2.2 Describe the annual maintenance of the areas listed in 2.1.

Woodland

Mostly a low maintenance style of gardening.

  • Pruning – trees may require some pruning in their first years and following that dead limbs may be pruned out. On the whole woodland garden trees are left alone, but crown thinning can be used to let more light in.
  • Raking – leaves should be left to break down to a mulch that will provide protection from frost and nutrients. However an exception to this is when leaves show signs of fungal disease or if leaves fall particularly thickly so that ground cover plants are swamped.
  • Weeding – remove any invasive species and control planted ground cover plants that may be too vigorous.
  • Watering – mostly not necessary, but if there is a drought on then every two weeks may be useful.

Wildlife

  • January – plant trees and shrubs now, ball on pond, clean and put out new bird boxes.
  • February – Provide bird food on tables and in feeders.
  • March – Good time to build a pond, keep feeding birds.
  • April – Plant pond plants after last frost, sow wild flower plugs and seedlings in meadow, cut meadow to 10cm.
  • May – prune trees and shrubs.
  • June – keep a check on pondweed and algae
  • August – water plants and shrubs during establishment (3 years), keep pond topped up with rain water
  • September – sow seeds for wildflower meadow, cut meadow after it has finished flowering
  • October – Clear out ponds before frog hibernation, start feeding birds
  • November – tree planting, cut diseased and damaged trees, clean out bat boxes

Sensory

Will depend on the specific plants used.

  • Thymus, Nepeta – herbs generally – need to be cut back in autumn.
  • Grasses should be left over winter and trimmed or thinned in spring depending on species.
  • Bamboos may need containment to prevent them running.
  • General border maintenance of shrubs, herbaceous plants and climbers will be necessary, but extra care will be needed to avoid encroachment by overhanging branches and to keep paving surfaces clean, leaf-free in autumn and in a safe condition, and to make sure woodwork is sound and splinter-free.

Low maintenance

Amenity low maintenance gardening usually gets visited two or three times a year and shrubs are cloud pruned, Buxus is trimmed, ground weeded. Attention isn’t paid to flowering times.

Grass/Steppe/Prairie

Takes a lot of work to establish, but after that is easy.

When you are growing from seed, controlling weeds during the first two or three years is tricky.

Prairie perennials spend the first few years developing a complex root system while remaining small seedlings above ground, making it difficult for them to compete with common weeds that put all their energy into producing above ground growth. Using plants that have already grown to a reasonable size can help this, otherwise frequent weeding is important.

Irrespective of whether you intend to use seeds or plants, the area to be planted must be completely free of weeds and grasses. Heavy clay soils should be dug to a depth of 30 cm to break up compaction. Organic matter such as compost, leafmould and sharp sand can be worked into poorer clay soils to improve aeration and water infiltration. Very dry sandy soils in particular will be improved by the addition of organic matter to increase their nutrient and water holding properties.

In the wild prairies are controlled by burning. Cultivation mimics this by mowing and removing clippings. Mowing and raking every spring also helps control weeds and promote growth. Mow in late June with the mower blade set about 20cm, this will cut back early growing annual weeds, but not affect slower-growing prairie grass and plants.

After 4 or 5 years, mow once a year after the seeds have fallen, or preferably, in the early spring. Remove clippings to expose crowns for regrowth.

Potager

Maintenance is the same as it would be for a vegetable patch, so digging (or no dig system), planting, feeding, managing pests, disease and weeds, and harvesting. Fruit trees and shrubs will require pruning and training. Using companion planting can reduce work (reducing pests and keeping down weeds) and can also make the potager more attractive. In general it will rely on its design lines ( trained fruit, bed shapes, arches and frameworks) and hard landscaping for winter interest.

3. Understand specialist pruning for effect.

3.1 Describe the use of pruning to produce decorative forms of ornamental trees and shrubs, including pollarding, pleaching, topiary, cloud pruning and wall-training.

Pollarding

Coppicing is cutting a plant almost to ground level each year to promote new shoots, whereas pollarding is cutting back for the same reasons, but keeping a length of stem, so that the plant (often a tree) is much taller. Originally this was done to keep new growth above the height of animals grazing in the field. Pollarding now is used to keep limes and planes within bounds and away from power cables, it is also used to give winter colour from Cornus and Salix at height.

Plants used on:

  • Fraxinus spp.
  • Tilia x europaea
  • Ulmus spp.
  • Sambucus spp.
  • Eucalyptus spp.
  • Platanus x hispanica
  • Morus spp.
  • Quercus spp.
  • Acer negundo
  • Liriondendron

Once young trees have reached the desired height, they can be pollarded, on a shrub this may be only 1m, on a tree the trunk should support three or five branches, twiggy growth appearing at the ends of these branches. Initially new branches are held weakly in place, but over the years a strengthened pollard head forms.

Pollard late winter or early spring, not in autumn as decay fungi may enter the cuts.

Pleaching

The art of manipulating trees into a raised hedge.

  1. Deciduous tree are planted in lines.
  2. Branches are then woven together and due to Inosculation (see below) the trees grow together to form a solid barrier
  3. Once merged together the trees can be clipped to their shape.

Inosculation is a natural phenomenon in which trunks, branches or roots of two trees grow together. It is biologically very similar to grafting. It is most common for branches of two trees of the same species to grow together, though inosculation may be noted across related species. It can also be used to create interesting forms.

Topiary

  1. Grow the plant to roughly the correct size
  2. Roughly prune to shape, may require removing number of the branches
  3. Once the plant has bulked up, more closely prune it
  4. Topiary can also be created using ivy and a wire frame.

Cloud pruning (Niwaki)

Cloud pruning is a Japanese method of training trees and shrubs into shapes resembling clouds. It is known as ‘Niwaki’, the translation of which is ‘garden tree’. The style is said to depict the distilled essence of the tree. This type of pruning does not have to be used in solely Japanese-style gardens; it can be used as a feature in gardens of many different styles, formal gardens often use it.

  • Box (Buxus sempervirens)
  • Yew (Taxus baccata)
  • Pine (Pinus)
  • Japanese privet (Ligustrum japonicum)
  1. Select tree/shrub with interesting branch formation
  2. Remove unwanted branches and twigs so that the main branches are bare.
  3. If the plant is to grow taller and wider don’t prune tips at end of branches, but the side shoots around the ends of branches can be shaped into clouds
  4. Once the plant has reached the desired length and height trim the tips to encourage branches so that the clouds fill out.
  5. Manipulate the branches using stakes or weights to get the correct shape.
  6. When to prune – annually in late summer (but if flowering, then after flowering).

Wall training

Soil at the foot of any wall is invariably poor and dry, dig out  to a depth of 45cm, then replace it with good-quality topsoil mixed 50:50 with well-rotted organic matter, to make a bed 60cm wide.

Use bamboo canes for climbers – a fan of canes leaning from the base of the plant to the wall. RHS article on training climbers.

Semi-tender wall shrubs – train slightly delicate shrubs flat over the wall, tying them to netting, trellis or horizontal wires supported by nails. Plants to use include Cytisus battandieri, Phygelius capensis and Carpenteria californica.

Woody climbers – Trachelospermum jasminoides, Jasminum officinale.

Although pruning depends on the individual needs of the plant, some tasks are very similar:

  •  Tie in new growth regularly to fill the allotted space.
  •  Tie in side shoots to fill gaps.
  •  Prune back overlong shoots.
  •  Removed dead, diseased and damaged shoots.
  • Remove crossing (touching and rubbing) and congested shoots.
  • Pruning takes place after flowering on those that flower on the previous year’s growth, or in late winter or early spring for those flowering on the current year’s growth.
  • After pruning, mulch and feed.

Pruning specific to climber types

Vigorous climbers –  No regular pruning is needed, prune only to keep to alloted space. Eg Parthenocissus, Trachelospermum.

Moderately vigorous climbers – shorten side shoots to within three to four buds of permanent framework. Examples:  Solanum crispum, Sollya heterophylla.

Wall trained shrubs – shorten sideshoots to within two to four buds of the permanent framework of branches. Remove shoots growing towards the wall. Examples: Chaenomeles, Garrya elliptica, Fuchsia.

Regenerative pruning – always carried out in autumn or winter. Take out a third of old stems at a time. Article.

Problems

Pruning at the wrong time of year may result in a poor display the following flowering season. Plants should recover and flower again fine in their second flowering season after pruning, so no long-term damage will have been done. Renovated plants that have been hard-pruned may take longer to re-start flowering.

3.2 Describe the use of pruning to produce specialist decorative forms suitable for fruit growing, including fan, espalier, cordon, stepover and festoon.

Fan

Fan trained trees consist of a short clear stem of about 0.5m and a set of branches above this arranged to form a fan shape.

RHS article – the following is essentially and abridged version of the article.

Plants: apple, pear, cherry and fig

  1. Choose semi-dwarfing or semi-vigorous rootstocks. eg     Apple: ‘M26’
  2. Choose a wall or fence of sufficient height – 2m.
  3. Erect strong horizontal wires starting 40cm above the ground, 4-10cm away from the wall and 15cm apart. Use 1.2mm galvanised wire.
  4. Choose either a maiden whip (a one-year-old tree with no branches), a feathered maiden (with two branches suitably positioned to be the main arms of the fan) or a part-trained fan
  5. Plant trees 15-22.5cm away from the wall or fence, sloping slightly towards it.
  6. In spring, cut back the main stem to about 40cm, leaving three strong buds
  7. In summer, erect two canes at 45 degree angles and tie in two of the branches that should develop from the buds to form the ‘arms’ (one either side). Remove any other shoots if they develop from the trunk
  8. In the second spring, reduce the ‘arms’ by two-thirds to an upward-facing bud. Remove any other growth from the trunk
  9. In summer, choose four shoots from each ‘arm’: one at the tip to extend the existing ‘arm’, two spaced equally on the upper side and one on the lower side. Tie them in at about 30 degrees to the main ‘arm’ so they are evenly spaced apart (using canes attached to the wires if necessary).
  10. Rub out any shoots growing towards the wall and pinch back any others to one leaf.
  11. In the following spring, cut back each of the four branches on each side by one third, cutting to an upward-facing bud if possible.
  12. During the growing season, tie re-growth from the tips of these branches into the framework to extend the main branches
  13. Any side-shoots that develop where there is space within the framework can be tied in.

Espalier

RHS Espalier

Espalier tree consist of a vertical stem and a set of horizontal arms or tiers extending either way bearing short lateral branches or spurs on which the fruit is produced.

Timing – summer

Plants: apple or pear, also Cotoneaster or Pyracantha. Rootstock can be MM106

Wires erected as above, plants 3.75-6m apart according to vigour

  1. When planting an unfeathered maiden, cut back the main stem to 30cm from the ground
  2. Allow the top three buds to grow out in spring, train the top one vertically up a cane, the others two to canes at 45 degrees to the main stem. In November, lower the two at 45 degrees so they are horizontal, tie them in.
  3. Cut back the vertical stem to within 45cm, leaving two buds to form the next horizontal layer and the top bud to form the new leader.
  4. The following year train the second tier in the same way as the first. Cut back competing growths on the main stem and sideshoots from the horizontal arms back to three leaves above the basal cluster.
  5. Repeat the process until desired size.
  6. Remove the blossom in spring, for the first three years, so all of the energy goes into plant growth.

Cordon

RHS Cordon

Single stemmed trained forms of fruit trees or bushes, consist of one main stem with short side shoots that bear fruit. They can be grown parallel, in diagonal lines or pleached together.

Suitable for apples and pears, spur bearing, non vigorous types.

Timing – Plant in winter, prune in summer

  1. 3 horizontal wires erected, 30cm from ground, 60-90cm apart.
  2. Plant in winter in an open but sheltered position. Use one-, two- or three-year-old cordons.  Use M27 rootstock (extremely dwarfing) or M9 rootstock (very dwarfing) for apples.
  3. Plant trees at an angle of 45 degrees, 60-90cm apart. (The wider spacing within the row is for infertile, shallow or sandy soils). Tie the cordon to the diagonal bamboo cane fixed to the wire support with a soft string.
  4. After planting, cut back all laterals (side shoots) longer than 10cm to three buds, leaving the leader and any short laterals unpruned.
  5. Summer pruning is carried out in August, when sideshoots over 22cm long are cut back to three leaves. Stems  from existing sideshoots or spurspruned to just one leaf beyond the basal cluster.
  6. Leave shoots less than 15-22cm long until mid-September and then shorten to one leaf beyond the cluster of leaves at the base.
  7. Prune any growth that forms after summer pruning in September. Prune to one leaf beyond the last cut.
  8. Tie the leading shoot (‘leader’) in to the support until it reaches the required length. Thereafter, prune it back and treat subsequent growth as for other laterals.
  9. When the cordons reach the top wire they may be lowered from 45 degrees to 35 degrees in early spring.  Again, once the cordon has reached the top of the support, prune it back in late summer.
  10. Over time the spur system can become over-long or complicated. Remove older and unproductive sections of the spurs. Occasionally rejuvenate the spur system by pruning back to a stub 3-5cm of the main stem cutting above a well-placed dormant bud.

Stepover (aka horizontal cordon)

Stepover

These have a short stem and horizontal branches and are a modified training method of the cordon.

Timing – Prepare support and plant in winter; start training in spring.

Plants – spur fruiting apple trees on M27 rootstock.

  1. It is necessary to start training on very young trees. Choose a supple maiden whipThe main stem must not have been pruned to encourage branching.
  2. A single wire is stretched between supports 1.5-2m apart, 45cm above ground.
  3. In winter, plant the maiden whip next to the post and tie in.
  4. In spring, start gradually and carefully bending the tree towards the horizontal wire. Tie the stem to the wire at several places to distribute the pressure and ensure it bends evenly, the gradual bending of the stem may take the whole growing season.
  5. In summer, shorten any laterals (side branches) that develop from the main stem to three leaves.
  6. Do not prune the leader until it reaches the desired length, then prune just above a bud.
  7. The subsequent summer and winter pruning is the same as for a single, oblique cordon.
  8. If the growth becomes more bushy and vigorous at the bent trunk end of the tree, an additional winter thinning may be necessary around that part.

Festoon

Festoon

This is training rather than pruning and refers to tying down branches of fruit trees and roses so that they form a balloon shape causing them to flower and fruit more. This is now more common in roses where willow hoops are used to bend stems so that they produce more flowers.

4. Know a range of options available for urban gardening.

4.1 Describe a range of options available in an urban situation, to include small front gardens; courtyards; container gardens; roof gardens; living walls; street plantings; conservatories and community gardens.

4.2 Identify any specific establishment and maintenance issues associated with the options in 4.1

Small Front Gardens

  • They need to be functional – a place to store bins, cars and bicycles, but also attractive since they are on show.
  • There needs to be good access for milkmen and postmen, with an obvious and quick route to the front door.
  • Hedges should be no more than 1m high so that intruders can be seen breaking in from the road.
  • Use SUDS when installing a drive, using reinforced grass or permeable macadam (Tarmac).
  • There may be a problem with rubbish blowing in from the road.

Establishment and maintenance issues

  • People don’t usually enjoy gardening in the front, due to pollution and lack of privacy, so ideally there should be plants that don’t require too much maintenance – shrubby plants, grasses and gravel gardens are good and reduce problems of watering.
  • Compaction may be a problem following building work – deep dig and add grit.
  • Front gardens on busy roads may be affected by salt spray – salt tolerant plants are Escallonia and Eleagnus, also pollution can be a problem.
  • Littering may be a problem, as is blown in litter. No gate may equal dog poo.
  • Front gardens may be subject to covenants restricting walls, hedges and planting.
  • Care must be taken not to overshadow the house or block light, eg Araucaria araucana is bad.

Some good front garden trees:

  • Betula albosinensis –cinnamon peeling bark
  • Genista aitnensis – July flowers
  • Gleditsia triacanthos

Courtyards

Description

Enclosed, introspective gardens that often use Moorish elements of water, foliage and scented plants. They use a barrier and sounds of water block out noise, scents block the smell of cooking. The enclosed nature of it can also create a microclimate where half hardy plants can grow.

Establishment and Maintenance issues

  • Access to courtyards for construction may be limited
  • Planting is often in raised beds or containers=more feeding and watering
  • Possibility of too much shade
  • Enclosed areas may lead to mildew and mould on hard landscaping.

Container Gardens

Description

Pots can be of many sizes and materials, such as clay, metal or plastic. Or more innovative containers might be old boots, sinks or baskets. Containers can be moved to suit both appearance and climate (eg moving plants to when the sun reaches most at that time of year, moving out of frost pockets.)

Establishment and Maintenance issues

Mainly watering use drip irrigation and drought tolerant plants (Yucca, Phormiums, Aeoniums). Plants will need regular feeding and the compost needs to be replaced annually.

RHS article on container maintenance

Roof gardens

Description

Can be intensive, semi extensive or extensive. Intensive are over looked roof gardens, planted in 15cm of soil, requiring a lot of water and maintenance. Extensive are not seen, planted on a minimum of 2cm substrate with more drought tolerant plants, appearance is not so important so plants are allowed to turn brown. Semi extensive have a slightly greater depth of substrate to allow more natural planting.

Establishment and Maintenance issues

 RHS Article on Roof Gardens

Living walls

Description

RHS Article on Living Walls

Establishment and Maintenance issues

Require more maintenance than living roofs, but provide sound/warmth insulation. Can have roots in air or in Leca. Stop roots growing into brickwork by providing plenty of water.

Street plantings

Description

Advantages:

  • reduce urban heat island effect by shading and evapotranspiration
  • Reduce pollution by intercepting particulates and absorbing greenhouse gases
  • Reduce flooding by intercepting rainfall
  • Reduce stress

Establishment and Maintenance issues

When choosing trees there needs to be an awareness of drought tolerance, excess shade cast and effect on biodiversity (native species?)

A system of pruning needs to be in place to stop street trees encroaching on property or hitting power lines.

Conservatories

Description

A heated, glass area to sit that is attached to the house, but filled with tender plants. Usually heated.

Establishment and Maintenance issues – good air circulation and heating appropriate to the plants is important. Maintenance problems are often structural such as too hot in summer, too cold in winter, leaking and so on. If building it will need planning permission.

Community gardens

Description

Can be small vegetable plots, large parks or greenhouses. Often built around a theme or aimed towards specific people to care for it (ie children or adults with learning difficulties.)

Establishment and Maintenance issues – finding and keeping reliable knowledgeable people to work on the gardens. Can be an organisational nightmare, may have a situation where everyone wants to manage or no one does – or everyone wants to have control, but no one wants to take official responsibility.

5.Understand how water sustainability can be built into a garden.

5.1 Describe how modern gardens can be adapted to conserve water and reduce run-off, including green roofs; water collection, storage and recycling; permeable surfaces; and mulches.

Green Roofs

Green roofs can help by intercepting rain as it falls onto rooftops, letting it soak into a substrate – with some excess draining down but much of the water being held and then taken in by roots and transpired by leaves. Extensive green roofs can be ‘retro-fitted’ to many flat or sloping roofs in cities because of the relatively light weights involved.

Plants for this type of roof have to survive extremes of temperature and relative periods of drought – Sedums are not exciting, and there are many other plants being trialled, but they do seem to work well.

Flat roofs are the best for greening and a flat, asphalt-covered garage is ideal for a carpet of sedums. By adding a concrete support filled with growing media you could choose to grow a wildflower meadow.

Tiled or corrugated garage roofs are not suited to living roofs but will support moss and lichen which are useful wildlife habitat. You can develop a green roof on your shed but many need additional reinforcement first.

  • Intensive green roofs – old-style roof gardens which are planted either in containers or at least a 15 cm depth of soil or substrate, and designed to be used or at least overlooked by people. Have high demand of water and maintenance.
  • Extensive green roofs – not generally intended to be used by people, or even to be seen in many cases. They are massed low plants on a substrate of 2-15cm depth, and therefore much more lightweight; the vegetation often goes brown in high temperatures, so these are also called ‘ecoroofs’ as they aren’t always green.
  • Semi-extensive green roofs – use the same lightweight growing media, but with a slightly greater depth to allow a greater and often more naturalistic range of plants to grow, such as the sustainable perennial mixes being researched by the University of Sheffield and

Construction – build a frame, line with butyl liner, filled with potting compost with lots of perlite.

Advantages to green roofing

  • Reduced energy and maintenance costs
  • Long roof life: Protects against UV and weather damage
  • Provides a habitat for fauna and flora species
  • 70-90% of rain water retained, easing pressure on drains and prevents river pollution
  • No reflected heat and prevents sealed surface heat build-up
  • Cools buildings in summer and insulates in winter
  • A useful, recreational space for roof gardens or terraces

Water collection

  • Grey water – all household waste water is called grey water, can be specially piped from the house into a bed or collection unit, but can’t be too polluted or may need treating/filtering.
  • Water butt – collects rain water from roof.

Rain garden

Is a dip or hole in the ground, planted up, where water run off from roofs and drain can collect. Because they prevent water running straight into storm drains, they reduce water pollution. The plants in the rain garden should be native plants with deep roots that can cope with both excess water and drought conditions.

Rain Garden Wikipedia

Mulches

  • Bark chipping (bio degradable, improves structure, can remove nitrogen from soil)
  • Strulch (cheap, bio degradable)
  • Gravel (can spread, looks attractive)
  • Landscape fabric (needs to be covered with gravel or bark or looks odd)
  • Black plastic (block water entering soil, cheap)

Benefits:

  • retains moisture in summer
  • suppress weeds
  • improve soil texture
  • deter some pests
  • protect plant roots from extreme temperatures
  • encourage beneficial soil organisms
  • decorative

Can be biodegradable (release nutrients and improve structure) or non-biodegradable (Eg landscape fabric).

How to apply: 5cm-7.5cm, lay over moist, weedless soil, keep away from stems.

SUDS

  • Permeable paving.
  • Infiltration and attenuation systems.
  • Filter drains.
  • Swales.
  • Ponds and wetlands and releas it slowly to the environment.

Porous paving – can be:

  • Infiltration system = porous pavement +geotextile + granular sub base + geotextile (which filters).
  • Attenuation system = similar to above, but with outfall pipe on impermeable layer so that water is contained.

3. Understanding the setting out and construction of landscaping elements in the garden


Note: for this unit I have mostly used references to the excellent website www.pavingexpert.com, it is very clear, with helpful photos and lots of information. However, I have also included my notes which are basically the information from pavingexpert pared down to the absolute essentials, since that can make it easier to get a framework of what to learn. For anyone studying Level 3 I would definitely advise reading the links as well.

 1. Understand the practical procedures for setting out a site to scale plans and drawings.

1.1 Describe how scale drawings are interpreted to set out the major features of a design on the ground.

Setting out

  • Use plans (from above), profile (from side) and cross section (shows a slice through garden).
  • On large projects use automatic levels and theodolites.
  • On smaller projects – string line, spirit level, tape measure and marker pegs.
  • Stake out relevant points and lines throughout the garden (eg a taut string line to show intended level of a patio, a spray painted cross to show where a tree is to be planted.)
  • To establish a straight line hold string taut between two pegs.
  • To mark points along a line, add a peg at the centre (touching, not bending string) and then pegs midpoint between existing pegs.
  • A right angle is found with 3,4,5 triangle.
  • Curves are created with an arc, using string held at a central point.


1.2 Describe how to set out the required levels on site.

1.3 Describe the sequence of works involved in the realisation of a design.

Assessment

Check:

  • Repair and pruning to be done
  • Soil condition
  • Health and safety
  • The site compared to the plans
  • Access and storage

Construction

  • Risk assessments (carry out)
  • Clearance (of any rubbish, unwanted plants)
  • Contouring (including ponds)
  • Services (working out location and working around them)
  • Landscape features set out
  • Foundations (for vertical and then horizontal landscaping)
  • Finish ponds
  • Construct features
  • Finish contouring
  • Ground preparation and soil improvement
  • Planting
  • Mulching
  • Turf laying
  • Final checks

2. Understand the reasons for correct soil movement and storage during construction works.

2.1 Describe the correct handling, storage and reinstatement of soil during site construction; to include separation, angle of repose and maintenance of soil quality during storage.

When making major changes to a garden, especially building and contouring, it is important to remove the topsoil first so that it can be stored elsewhere to ensure  it remains undamaged and doesn’t get mixed with subsoil. When all construction and levelling is finished, the topsoil can be reinstated, ready to be planted.

Topsoil is better for plants than subsoil, it contains more nutrients, has a better structure and contains helpful soil organisms, if topsoil and subsoil become mixed, then plants will not grow as well.

Construction is damaging to topsoil because heavy machinery causes compaction and damages the structure in a soil. Building also tends to result in rubble, dust and chemicals landing on soil, so removing topsoil stops these from contaminating soil and harming plants.

Angle of repose

This is the angle at which a pile of soil is stable, it is 45°, unless the soil is to be seeded with grass, in which case it is 25°.

Storage

If soil is stored for longer than 2 weeks, the centre becomes anaerobic, if the soil has been stockpiled well it will revert to aerobic when spread, but if it has not, then structure will be spoiled.

Stockpiles should not be near roots of trees, next to ditches, watercourses or future excavations.

If the storage is long term (6 months) then seed with grass or a green manure to stop weeds.

Soil should be stored dry (non plastic), because:

  • It is less prone to compaction
  • It retains structure
  • It re-spreads easily
  • It easily breaks down to a fine tilth
  • It can be stored in a larger pile (3-4m high)

 2.2 Describe the procedures required to reinstate the soil to the levels specified in the design.

Machinery for Reinstating Soil

  • Spade and wheelbarrow for small garden.
  • Digger or mini excavator for slightly larger sites.
  • Backhoe digger/ JCB for large sites.
  • CAD packages (computer aided design) can be used to quantify amount of soil needed to be cut from one area to build up another,

Process to Create Levels in the Garden

  1.  Remove topsoil and store as described above
  2. Calculate and mark out levels
  3. Dig out subsoil to levels required (eg 30cm lower than the final level needed)
  4. Use surplus subsoil to build up higher areas
  5. Cover with topsoil to an even depth

 2.3 Describe how biosecurity measures are used to prevent the distribution of pests and diseases through soil handling/storage and reinstatement.

Storage of soil should not be in a contaminated area (eg where there has been phytophthora) or from a contaminated area to a non contaminated one. It’s important to stop weeds growing in stored soil, since weeds can encourage both pests and diseases. Soil stored wet is also more likely to encourage fungal disease.

When buying topsoil in it must conform to British Standards and the following questions asked to determine that the soil is free of pest and disease:

  • Where does the soil come from?
  • Is it stored in an area protected from the elements?
  • Is it free of Fallopia japonica?
  • Is it manufactured or naturally occurring?
  • How is it delivered?
  • Has it been tested for PTE (potentially toxic elements)
  • Will it be workable as soon as delivered?

3. Understand the factors which determine the type of drainage system required in various situations.

3.1 Describe the construction of an intercept or French drain to collect run-off, a pipe drain system to lower the water table and a soakaway to drain a localised wet area.

Intercept Drain

Intercept drain construction

  1. Dig trench 25cm wide, 90cm deep.
  2. Trench is lined with geotextile.
  3. 10cm layer of pea gravel.
  4. Add drain – perforated pipe.
  5. Back fill with pea gravel.

Soakaway

Soakaway construction

  1. Soakaways allow water to be released to surroundings slowly.
  2. A hole is dug 130cmx130cm wide and 160cm deep.
  3. At least 5m away from any building.
  4. 1cm layer of gravel in bottom.
  5. Line hole with geotextile.
  6. Place cells (like crates) into hole.
  7. Wrap geotextile around cells.
  8. A PVC pipe is lain so that it enters the cells.
  9. Cover with 10cm of gravel and then topsoil.

4. Know materials and construction procedures for paths, patios and driveways for parking and light use.

For materials see previous blog, unit 1.1

For procedures see following units in this blog

4.1 Define the terms ‘flexible’, ‘rigid’ and ‘permeable’ in relation to paving.

 4.2 Describe a range of appropriate surface materials for paths, patios and driveways for parking and light use. To include: concrete, gravel, bricks, block paving, natural and artificial stone and paving.

For materials see previous blog, unit 1.1

4.3 Specify appropriate foundations for (i) a concrete path, (ii) an aggregate driveway (iii) a slab or natural stone patio (iv) a permeable hard-standing area.

4.4 Outline the procedures for preparing the site and laying foundations for the situations mentioned in 4.3.

4.5 Outline the procedures for laying the surface materials mentioned in 4.2.

4.6 Specify appropriate edging materials for the situations outlined in 4.3 and describe their installation.

Concrete Path

Constructing a concrete path (including foundations)

  1. Excavate to 10cm.
  2. Build temporary formwork.
  3. Lay damp proof membrane.
  4. Mix cement with 1 cement : 2 sand : 3 gravel.
  5. Level with strong rake or shovel.
  6. Tamp down using straight edged timber.
  7. Finish – done as concrete starts to harden, use steel float trowel.
  8. Cure by keeping moist or covering.

Gravel Driveway

Gravel driveway construction (including foundations)

  1. Decide where driveway is to run and mark out.
  2. Dig to a depth of 10cm.
  3. Remove all weeds from the area, use weed killer if serious problem or use geo membrane.
  4. Install edging – timber gravel boards – stakes hammered into ground using line to keep straight, rails nailed to stakes.
  5. 5cm of sub base DTp1.
  6. 1 tonne of DTp1 granular sub-base covers approx 6-8 m² at 7.5cm compacted thickness.
  7. 5-4cm gravel.

Natural Stone Patio

Patio construction (including foundations)

  1. Dry lay patio to check how it is going look and that there are enough slabs.
  2. Be sure slabs are the right way up – flags taper inwards so top surface larger than lower.
  3. Dig out 15cm deep.
  4. Fall of 1:60.
  5. 6:1 ballast:cement cover hole to depth of 7.5cm.
  6. Lay mortar bed of 6:1 sand:cement.
  7. Set up 2 taut string lines to guide line and level, including drainage fall.
  8. Use rubber mallet to tamp down slab, tap all corners until at correct height.
  9. Use spirit level to check levels.
  10. Leave for 24 hours to harden.
  11. Mix mortar 3: sand to cement and trowel into joints.

4.7 Describe the construction of an area of permeable hard standing (to include reinforced grass and permeable paving).

Permeable Hard Standing

Permeable hard standing construction

  1. Ground is dug out and edge restraints (paving on edge) are concreted in, with 10cm of concrete below.
  2. Permeable geotextile is used to line the pavement.
  3. Sub base of coarse graded aggregate to 30cm depth is poured in by digger and raked out level.
  4. Then compacted with vibrating plate.
  5. Then finer aggregate is poured in to 5cm.
  6. Special permeable paving blocks are then lain.
  7. Blocks compacted in, then jointed with grit.

 Grass Paving

Grass paving construction

Edging

Most of the above links talk about edging, but here are some extra pages:

 5. Know materials and construction procedures for steps and ramps.

5.1 Specify appropriate foundations for one step and one ramp.

5.2 Specify two appropriate materials for a step and two for a ramp.

Materials

Ramp – aluminium, cedar

Steps – bricks and stone flags

5.3 Describe the construction of one type of step and one type of ramp.

 Steps (built on a slope)

Construction of steps

  1. Mark out site using line and pegs, check right angles.
  2. To work out how many steps needed measure vertical height and horizontal distance of steps (use spirit level).
  3. Strip away turf from marked out area.
  4. Roughly shape the steps with a spade.
  5. Footing for first riser is 12.5cm deep trench, fill with concrete, leave for 24hrs.
  6. Mix mortar using 4:1 sand to cement.
  7. Build two layers of brick in stretcher bond – check with spirit level.
  8. Fill behind first step with hardcore up to top step.
  9. Lay bed of mortar on hardcore and put on stone slabs.
  10. Fill in joints with mortar.
  11. Build next riser on lower- tread and keep on building up steps.

Ramp

  1. Dig hole for corner posts and pour in concrete.
  2. Attach anchoring brackets to attach rails to (across the ramp).
  3. Aluminium sheets are nailed across the rails.
  4. Ramps should be a minimum of 90cm wide and have a fall of 1:12-1:16.

 6. Know materials and construction procedures for low garden walls, retaining walls, fences and pergolas.

6.1 Specify materials suitable for the construction of the following: (i) a single-skin garden wall; (ii) a double-skinned or retaining garden wall; (iii) a low wall for a raised bed; (iv) one modular fence; (v) one non-modular fence and (vi) a pergola.

 6.2 Outline procedures for erecting: (i) a retaining garden wall; (ii) a low wall for a raised bed; (iii) a fence; (iv) a pergola.

6.3 Specify foundations (where appropriate) for each of the constructions named in 6.1.

Single skin Garden Wall

Garden walls (single, double and retaining)

A single skin wall is the width of one brick width.

  1. Dig a trench to 25cm below ground and for 10cm either side of the brick width.
  2. Pour in a concrete footing, depth of 10cm.
  3. The wall goes 15cm deep into the ground, mark out where it will be built.
  4. Start with corners and ends first.
  5. Mortar is 6:1 sand:cement, not too sloppy.
  6. Jointing can be flushed, weathered, rubbed or recessed.
  7. Check levels while building and ensure the wall does not belly out.
  8. Damp proof course is 15cm above ground.
  9. Once the wall is the desired height, add coping.

Double skinned or Retaining Wall

A retaining garden wall is one that supports the weight of soil on one side. To build it the rules are similar to above, however the footing needs to be stronger and it’s important to include features that prevent damage from damp that can be caused buy the soil.

  • The concrete footing is 15cm deep.
  • An impermeable drainage board is attached to the retaining side of the wall.
  • Pea gravel is against the drainage board.
  • An 8cm land drain is inserted into the pea gravel.
  • A permeable geotextile holds in the gravel.
  • A 1.5cm copper pipe is inserted into the wall.

Low Wall for Raised Bed

Materials for a raised bed wall can be railway sleepers, steel or brick

Building with Railway Sleepers

  1. A concrete foundation 5-10cm deep can used for the foundations, alternatively gravel which is better for drainage.
  2. Lay the sleepers on top of the foundation, staggers the joints, like building a brick wall.
  3. Fasten each layer to the layer below with screws.

Fence

Fence construction

  1. Set up taut string line and measure where posts will go – 1.8m apart.
  2. Dig hole for posts 30cmx30cm and for 1.2 m high fence, 5.5cm below ground.
  3. Mark on post where ground level should be.
  4. Put 5cm concrete in ground and lower post onto it to required depth.
  5. Align post vertically and jam in bricks to keep steady.
  6. Fill in with dry mix concrete and add water.
  7. Panelling is then slotted into place.

Pergola

Pergola construction

  1. Dig holes 30x30cm depth of 50cm.
  2. Concrete in posts to depth of 45cm – with 5cm concrete at base.
  3. Let concrete set over night.
  4. Attach side rails with inline braces – rails nailed to posts and braces.
  5. Attach cross members.
  6. Attach traverse braces.

 7. Know materials and construction procedures for a water feature.

7.1 Specify suitable materials for the construction of (i) a formal pond (ii) an informal pond.

7.2 Outline the procedures for constructing (i) a formal pond (ii) an informal pond.

Formal pond

Informal pond

 8. Know materials and construction procedures for a rock garden.

8.1 Specify a range of materials suitable for the construction of a rock garden.

8.2 Specify an appropriate method for the construction of a rock garden.

Rock Garden

Building a rock garden

  1. Dig out topsoil and add in a mixture of grit, sand and leaf mould
  2. Dig in boulders two thirds above ground, one third below
  3. Large boulders first

    9. Understand risk assessments.

    9.1 Determine the elements of risk in operations associated with this unit.

 Health and Safety Executive site with forms and information

Some risks associated with building and garden restructure:

  • Slips trips and falls – avoided by keeping paths clear, clearing up spillages, using signs around holes in the ground.
  • Injury from hand tools and machinery – all gardeners to have proper training and fully working tools and machinery, and PPE (eg goggles and gloves).
  • Damage to people and property by vehicles – use vehicles with good visibility, make sure to close off all dangerous areas to the public, vehicles only driven by fully licensed staff.
  • Damage to services (water pipes, electricity and gas) leading to injury – ascertain where services are before starting.
  • Long term physical injury such as bad backs, knees etc – staff to use proper lifting techniques and observe limits, to receive training as necessary.

It’s also important to plan emergency exit routes before starting and have a first aid kit on site (having a first aider is even better).


Understanding the selection and use of landscaping elements in the garden

The learner can: 1. Understand the contribution made by hard landscaping features to design and function.

1.1 Evaluate how a range of hard landscaping features contribute to the design and function of an ornamental garden. To include paths, patios, driveways, walls, fences, pergolas, ramps and steps.

Paths – can be used to lead a journey through the garden, can connect up different ‘rooms’ within the garden, can be natural (bark chipping) or contemporary (granite and gravel). If a path is meandering it gives a sense of slow movement, if it is straight then the movement is more dynamic. Paths stop people treading on grass and damaging it. They are easier for wheelchair use.

Garden path ideas

Patios – can be a work of art (brickwork or gravel patterns), are useful for entertainment (barbecues and seating), can have pots on, can break up a large area of grass. Materials can be used that connect the house and garden.

Driveways – mostly functional, for cars. Can be attractive with patterns or brickwork. Materials chosen can create unity in the garden or connect the house to the garden. Gravel driveways make noise when walked on and alert homeowners to intruders.

Walls – for privacy and security or marking of a boundary. Can be used to tie a garden together. Can be used to split a garden up, or obscure some areas to add interest. Can be decorative. Plants can be attached to create a living wall. Can contain habitat boxes. Styles are versatile – cottage or contemporary. Can act as a background for plants to stand out against. Protects the garden from wind and rain, a south facing wall may make it possible to grow tender plants.

Wall design ideas.

Fences – for privacy and security, marking of a boundary. Also can be many styles, from small picket to high featherboard. Can support climbers and wall shrubs. Protects the garden from wind.

Garden fence ideas

Pergolas – can connect areas of a garden. Pergolas are used for climbers to provide flowers for a longer season of interest, there by adding scent or colour to a design. Provide a shady walkway in a sunny garden or a private walkway in an exposed garden. Provide vertical design element.

Ramps – functional for wheelchairs. Connect different areas of the garden and contribute to different levels that provide interest.

Steps – functional, to lead from one area of a different level to the other, a handrail for those with mobility issues. Steps can also be attractive, fitting to the design style and contributing to the effect. Steps are part of having different levels for the garden, making it more visually interesting.

1.2 Evaluate the range of hard landscape materials for horizontal and vertical uses in the ornamental garden.

Things to consider when choosing hard landscaping materials:

  • Strength and durability
  • Appearance and how it fits with the style of the garden
  • Sustainability
  • Maintenance
  • Safety

Vertical

  • Brick
  • Timber (oak, cedar)
  • Bamboo, hazel or willow
  • Metal (iron, aluminium)
  • Vinyl

Brick – strong, warm colours or painted. Can fit in with most garden styles. Requires skill and time to install. A number of different colours can be used and reclaimed bricks can fit with classic styles. Can match house bricks to unify the house and garden. Bricks can crack and chip in frost, and will get moss in time.

Timber – for fencing pergolas, arches or fences. Fences may be prefabricated eg larch lap fencing; or constructed on site eg closeboard fencing. Needs regular treatment with preservative, hardwood (eg cedar) longer lasting than softwood.

Hazel/willow – Coppiced hazel or willow provides rustic wattle fencing. This is attractive, but not very long lasting.

Metal – for gates, railing, arches and pergolas. Wrought iron fits with Victorian style, aluminium alloys for cheaper and more contemporary fencing. Both need regular maintenance. Utilitarian fencing is provided by wire mesh or chain link fencing. This may also be plastic coated.

Vinyl – easy to care for – doesn’t need treating or painting, damage is almost invisible. Can be easily cleaned, even of graffiti. Cheap and strong.

Chain link – utilitarian, easy to install, cheap and effective, but ugly.

Horizontal

Media:

  • Gravel
  • Decking
  • Natural stone
  • Concrete and imprinted concrete
  • Brick
  • Bark
  • Shredded rubber
  • Cobbles
  • Reinforced grass
  • Tarmac
  • Log slices

Gravel

Advantages: cheap and incredibly easy to lay, can be made into curves and irregular shapes, makes a noise when walked on that may deter burglars. Disadvantages: spreads into house and not good next to lawn, not good to walk on in bare feet or for wheelchair and pushchair use, needs to be raked to keep tidy.

Brick

Advantages: Links the house to the garden. Due to small size, good for patterns. Disadvantages: Durable, but not indestructible. Can develop moss, mould and mildew. Difficult to clean, requires scrubbing. Slippery in icy weather. Not always frost proof. Trickier to lay. Uncomfortable to bare feet. More expensive than concrete. Due to small size, bad for large areas.

Decking

Can be grooved or smooth. Advantages: Looks contemporary or classic, can overcome problems of uneven garden + have different levels, cheapish and easy to lay. Disadvantages: needs to be cleaned, gets moss, can be slippery, not as long lasting or maintenance free as stone.

Concrete

Can be imprinted for more interesting patterns and colours. Is tough and cheap

Natural stone

Slate, granite flagstones and Yorkstone. Local stone more in keeping and environmentally friendly. If stones not similar sizes, need to be ‘dressed’. Reconstituted or artificial stone is cheaper, but less attractive. All natural stone has similar advantages and disadvantages – expensive, heavy, natural-looking, strong. May be ethical (child labour) and environmental (limestone mining has destroyed habitats) concerns. Reclaimed stone – cheap, environmentally friendly and with instant character.

Natural slate

Advantages: looks more natural, contemporary or cottage, non slip due to rough surface, tough. Disadvantages: expensive, heavy, slate mining has caused environmental damage and led to waste products (although slate waste is now being used in landscaping), because of weight needs solid base, eg concrete

Bark

Useful for play areas (soft to fall on) or in woodland setting (natural).

Shredded rubber (rubber chips, see below)

For play areas and paths, soft to fall on. Recycled from car tyres

Cobbles

Difficult to walk on, easy to fit in awkward spaces. Often used to discourage walking on a specific area.

 Tarmac

Useful for driveways. Functional, easy and cheap rather than aesthetic. Grit and pea shingle can be added to the mix to make it more aesthetic.

Log slices

Natural look for woodland setting. Logs can be very slippery when wet.

1.3 Evaluate a range of surface materials for use in children’s play areas.

Materials

  • Play bark
  • Wet pour rubber surfacing
  • Sand
  • Rubber chips
  • Pea shingle
  • Grass

Play Bark

Drains well, but absorbs water leading to it being wet some time after rain. Breaks down over time and needs replacing,  it compacts so needs occasional raking. Pieces can stick to clothes and get carried inside.

Wet Pour Rubber Surfacing

Soft enough to stop children from getting hurt if they fall, but hard enough to run on. Can be covered in any design – games, pictures. It’s durable. Pictures.

Sand

Soft to land on and can be used in play, but tends to get walked into the house, can attract cats that think it is cat litter.

Rubber Chips

Uses recycled car tyres, doesn’t break down, drains well and doesn’t compact like bark does, but costs about the same.

Pea shingle

Isn’t as small as sand, but still can get carried into the house. In order to prevent injury from falls it needs to be 15-20cm deep. Doesn’t break down and drains well.

Grass

Needs maintenance and gets damaged easily, cheap and soft to fall on.

1.4 Evaluate the suitability of hard landscaping materials and structures for the use of people with mobility restrictions and visual impairments

  • Straight paths and borders – easier to navigate
  • Raised beds – less need for kneeling down
  • Use sub base beneath paths to stop cracking – potential trip hazards
  • Use strong horizontal landscaping materials – less likely to crack –  concrete, asphalt
  • Ramps
  • Handrails
  • Places to sit
  • Landmark plants and features (incl. noisy things) – to aid navigation for the visually impaired
  • Windchimes and water features – for pleasant sounds

1.5 Evaluate a range of materials for use in rock gardens, water features and containers.

Rock gardens

Factors to consider

  • Appearance
  • Durability
  • Conservation
  • pH
  • Cost
  • Weight

Materials

Natural rock

Limestone, sandstone. Not granite – does not weather easily, or chalk – weathers too easily.

Use local stone for sustainability and continuity of style with local area

Pay attention to strata lines which need to be considered when positioning rocks

  • Limestone – only purchase second hand so as not to destroy habitat. Due to pH is only suitable for calcicoles
  • Tufa – type of limestone, lightweight alternative, naturally porous, or holes can be drilled.
  • Stone chippings – used with large stones, must match colouring well.
  • Yorkstone – variety of textures and colours

Artificial materials

  • Pulhamite – no longer available, article about it here
  • Concrete based – use beneath rocks
  • Reconstituted stone – usually cheaper and definitely greener than natural stone, article here (described as cast stone)
  • Fibreglass – light, cheap, less durable and attractive
  • Polyurethane – 2:2:1 sharp sand: coir: Portland cement, cheap, light and can be poured to shape. Less durable and can look cheap or fake.

Water features

Types of water features:

  • Water fountain
  • Bird bath
  • Stream
  • Raised pond
  • Wildlife pond

 Materials

  • Flexible pond liners – butyl (resistant to UV) or PVC
  • Inflexible pond liners – plastic or fibreglass (tough, long lasting and UV resistant)
  • Clay – for informal pond, can be damaged by roots or burrowing animals, drying out  leads to cracking,
  • Rock – can be used for pond edging or drilled to make water feature
  • Wood – used with a liner, create raised pond, more natural feel

Containers

Considerations

  • Weight (when moving about or positioning on a balcony)
  • Colour and shape to fit with design
  • Cost
  • Durability
  • Water retention

Materials

  • Terracotta – attractive, robust and stable, porous so drains well, but may crack in frost
  • Wood – attractive, long lasting, can be painted to suit garden, but prone to rotting and splitting, heavy.
  • Metal – often light weight, contemporary, robust and long lasting, retains water, but gets hot in summer and relatively expensive.
  • Plastic – inexpensive and easy to buy, wide variety of colours and style, light and easy to clean, retains water, but quite unattractive, and not environmentally friendly .
  • Concrete – inexpensive and long lasting, but heavy and not environmentally friendly.
  • Glazed – robust and stable, inexpensive, but prone to chipping and cracking, heavy to move.

1.6 Review how considerations of safety may influence the choice of structures and materials used in the garden

Issues to be considered

  • Ponds – dangerous for children, use pebble fountain instead, or use mesh over the pond
  • Trip hazards – can be uneven paving or pots on paths, keep paths clear and well maintained
  • Slippery surfaces – consider the site, is it shady and damp, north facing? Use materials with grip
  • Hard landscaping without glare
  • Paths – wide enough for two people to walk
  • Sharp edges – especially metals
  • Glass – horticultural glass traditionally used in domestic greenhouses can shatter easily. Safety glass or polycarbonate may be a better option.
  • Gravel – might be thrown by children, but can alert owners to intruder
  • Overall keep the design open, airy and possible to see all parts of the garden from the house

Articles about safety in the garden

 1.7 Review how considerations of sustainability may influence the choice of structures and materials used in the garden

Issues to be considered

  • Local sourcing of materials
  • Carbon footprint – imported materials carry a large carbon footprint due to transport
  • Recycling – composite decking, recycled containers, re-using materials available on site, such as existing bricks or paving
  • Subsequent management and treatment – for example, does maintenance require large inputs of preservatives or herbicides
  • Permeability of materials – to prevent run off and flooding, permeable paving and SUDS (new regulations limit amount of impermeable paving allowed)
  • Green roofs and walls
  • Water recycling – water butts, permeable paving
  • Compost bins
  • Low carbon lighting and energy (solar powered)
  • Drought tolerant planting and maximum biodiversity
  • Timber used in the garden should carry the FSC (Forestry Stewardship Council) logo to prove sustainability

Some articles on sustainable material:

2. Understand the function of drainage systems in the garden.

2.1 Evaluate the range of drainage systems available for use in a domestic garden, to include intercept or French drains, pipe drains and soakaways.


Description Advantages Disadvantages
French drain A hole containing rubble below ground. Can be with or without a pipe. Useful alongside a patio or next to a house to catch excess water. Acts as a reservoir used to water other plants Can be ugly because they need stones at ground level, although these can be incorporated into design
Pipe drain A trench contains a  plastic or clay perforated pipe below ground. Can dig a trench and lay the pipe or just draw the pipe through the ground. Cannot be seen. Long lasting Disruptive to install. Difficult to monitor. Plant roots may block pipes
Soakaway Cells wrapped in geotextile sit in a large hole below ground, a pipe leads to the cells. Cannot be seen. Filters out pollution Disruptive to install. Can fill up so that water cannot drain


Signs of poor drainage

  • Dark grey/ bluish black or rust colour in the soil profile
  • Smell of stagnant water
  • Water sits on the surface a few days after rain

Advantages of drainage

  • Creates better soil structure
  • Stops plant roots from being starved of air so greater range of plants can be grown
  • Plant roots grow deeper searching for water = greater stability

    3. Understand the contribution made by soft landscaping features to design and function.

    3.1 Evaluate the contribution of a range of soft landscaping features to the overall design and function of a garden, to include hedges, beds, borders, trees, ground cover, rock and water features and containers.

  • Hedges – security, boundaries, wildlife (hedgerow), can be used to divide garden into ‘rooms’ or for continuity (to connect different areas of the garden, eg with a series of connecting low hedges). Can create interest in the garden (with flowers, fruit or evergreen leaves).
  • Beds – create interest (shrubs, perennials and trees), for wildlife, can have a colour theme or contain scented plants, can be raised for easy access. Can be cut flower/ herb/ herbaceous/ prairie/ sub tropical/ carpet bedding/ vegetable beds.
  • Borders – define the edges of the garden, create interest (same as beds)
  • Trees – can provide year round interest with evergreen leaves or with colourful bark, can have fruit, autumn colour, provide privacy, can contain a tree house or be climbed, provide shade, provide structure to the garden, can be a home for wildlife (especially birds).
  • Ground cover – reduce maintenance by reducing weeds, fill in space in beds, provide interest low down in the garden. May have flowers, interesting foliage or scent.
  • Rock garden – provide interest with unusual plants
  • Water features – cover up noise, create soothing sounds, attractive to look at, provide habitat for wildlife (especially frogs and fish).
  • Containers – can brighten up a patio, can be easily changed to provide interest through the year, can be moved to areas of the garden when bare. Can be used to make up a green walls or attached to walls/fences and create a vertical interest. May contain tender plants.

3.2 Describe the use of planting plans for beds and borders.

Planting plans are used to show where plants should be and how many to plant. They can come in a number of styles, CAD (Computer Aided Design) or hand drawn, the styles can be distinctive to a specific artist, but there are standard symbols and notation. Planting plans can give the client a sense of how a garden will look, but are most useful if the person planting the garden is different to the designer. Proper Latin names are used to prevent confusion. Plant names can be written down the side of the plan or in the outline of the plant. Colour can be used to give an impression of the garden, but the colours will change from season to season. The habit of plants can be included in the plan to give a sense of how the plants work together.

A number of planting plans to give an idea of the variety

 3.3 State details of the decorative merits, height, spread and site requirements of a selection of plants to include: alpine; aquatic and marginal; herbaceous; woody plants; climbers; ground cover; plants for seasonal display; plants for sensory impact.

Note: rather than write out the details of plants I have provided links from the RHS website, since I assume this information is most likely to tally with the  opinion of the examination board (it’s surprising how much opinions on the details of plants can vary from one source to another), plus this site is very clear in laying out the site needs and decorative merits. I have tried to repeat plants as much as possible so that there are fewer to learn. I have only provided species names and links if that is the first time the plant is mentioned.

Alpine


Aquatic:

Marginal

Herbaceous

Woody Plants

Climbers

Ground cover

Seasonal

Sensory impact: (note – more on this in Unit 4.2)

3.4 Describe a range of plants to ensure continuity of interest in the garden.

When considering continuity of interest it’s important to think about how plants change throughout the year and how those changes relate to changes in other plants. Some plants have a brief season of interest and then die back, others constantly change throughout the year (flowers, fruit, autumn coloured leaves and stems) and still others are evergreen and fairly consistent. The following is a list of plants that provide varying interest throughout the year.

  • Prunus serrula – white blossom in spring, yellow leaves in autumn and beautiful red bark continues through the year
  • Acer capillipes pretty pink fruits in autumn, leaves also turn yellow, unusual green striped bark throughout the year
  • Vinca minor ‘Argenteovariegata’ – spring – autumn flowers, leaves are evergreen, ground cover (continuity of interest should take into account different levels in the garden)
  • Viburnum tinus ‘Eve Price’ – pink and white spring flowers, blue autumn berries, evergreen leaves
  • Berberis thunbergii – spring flowers, autumn berries and leaves turn bright red

3.5 Describe a range of plants to cope with permanently arid and permanently wet soils.

Permanently arid

Permanently wet

3.6 Describe five plants suitable for each of the following difficult situations: north-facing walls, dry shade, shallow chalk, heavy clay, coastal areas.

North facing walls

Dry shade

Shallow chalk

Article here about chalky conditions

Heavy clay

 Coastal areas

3.7 Describe a range of calcifuge plants:

  • Abies koreana
  • Acer
  • Myrtus communis
  • Trachelospermum
  • Phormium

    4. Understand the contribution made by turf to the design and function of a garden.

    4.1 Describe the design possibilities of grassed areas (including mowing effects and heights, turf mazes).

  • Mown paths through wildflower meadows
  • Turf mazes
  • Patterned turf – can be achieved by mowing with a roller or brushing dew with a broom
  • Medieval turf seats

4.2 Describe a range of seed mixtures suitable for a utility lawn, fine turf and shady areas, and wildflower meadow.

Seed mixtures

Hard-wearing and utility use

  • Lolium perenne (Perennial rye grass)

Fine, close-mown lawns

  • Festuca rubra var. commutata (Chewings fescue) and
  • Agrostis tenuis (Brown top bent)

Drought resistance and light textured soils

  • Poa pratensis (Smooth stalked meadow grass),
  • Festuca rubra var. commutata (Chewings fescue),
  • Festuca rubra var. rubra (Creeping red fescue)
  • Festuca ovina (Sheep’s fescue)

Heavy textured soils

  • Lolium perenne (Perennial rye grass)
  • Poa trivialis (Rough stalked meadow grass)

Damp and shade areas and under trees

  • Poa nemoralis (Wood meadow grass),
  • Poa trivialis (Rough stalked meadow grass),
  • Agrostis canina (Velvet Bent)

Utility lawn – Dense and compact with rich colouring. 55% Lolium perenne, 45% Poa pratensis

Fine turf – most expensive to establish and needs special preparation. Consists of fine leaved grasses, needs frequent mowing to produce uniform growth. 80% Festuca rubra var. commutata, 20% Agrostis tenuis.

Shady area – 50% Poa trivialis, 25% Poa nemoralis, 25% Festuca ovina

Wild flower meadow – 20% Festuca rubra, 40% Festuca ovina, 10% Agrostis canina, 30% FlowersLeucanthemum vulgare (Ox Eye Daisy), Achillea millefolium (Yarrow), Ajuga reptans (Bugle), Prunella vulgaris (Selfheal), Sanguisorba minor (Salad burnet), Hypericum perforatum (Perforate St John’s Wort). Also bulbs Galanthus nivalis and Crocus tommasinianus , Narcissus bulbocodium and Fritillaria meleagris.

4.3 Describe the annual maintenance routines for a utility lawn, a fine turf lawn, a shady lawn and a wildflower meadow, including the appropriate equipment.

Maintenance

Wild flower meadow – cut twice a year, once in autumn (late august to September), once in early spring. Remove the cuttings so the wildflowers can grow. Good to leave some areas uncut for the insects. Remove build up of plant litter and weed out dominant grass species.

Annual turf maintenance program for all lawn types

January

  • Remove fallen leaves.
  • Send mower for service.
  • Avoid walking on turf in frozen weather.
  • Turfing possible when frost-free.

February

  • Scatter worm casts if dry.
  • Prepare ground if intending to sow

March

  • Rake leaves.
  • Mowing – remove a third at most.
  • Repair damaged turf.

April

  • Feeding and weeding starts end of April.
  • Weed control – Lawn Sand or Selective Herbicides.
  • Mowing height is approx 2-5cm depending on lawn quality.
  • Mow once a week by end of month.
  • Re-seed bare patches in April.

May

  • Mowing frequency is increased during May, height 1-3cm depending on quality
  • Mow once per week by the end of the month.
  • Trim lawn edges
  • Weed control.
  • Irrigation if needed.

June

  • Mowing 2x per week. In dry spells raise mowing level.
  • Rake lawn before mowing to remove weed runners.
  • A grass box must be used to avoid spread of the runners.

July

  • The frequency of mowing is reduced at this time of year unless lawn is regularly irrigated.
  • Weed killing still possible, but less effective.

August

  • The frequency of mowing may increase at this time of year, due to increased rainfall.
  • This is the last month during which Nitrogen rich fertilizers or Weedkillers can be applied.

September

( A very important month for fine and recreational turf)

  • Reduce mowing.
  • Increase height of cut to autumn level, 2-4cm depending on quality
  •  Use a besom broom to sweep away worm casts, allowing dew to evaporate first thus eliminating smears..
  • Autumn fertilizer treatment, e.g. high Phosphates (root development) Potash (hardens growth ).
  • Scarification – with a springbok rake or with a lawn rake to reduce thatch.
  • Apply grass seed if bare patches are left
  • Spikingnormally carried out after scarifying, using: Solid tines on light/sandy soils; Hollow tines — heavy/clay soils
  •  Top dress after spiking. Spread at a rate of 2.5 kilograms per square metre max and work into surface using:  true lute;  back of large rake; other home—made implement

October

  • Mowing comes to an end this month.
  • Cutter height raised to autumn/winter level.
  • Brush up fallen leaves.
  • Moss killer used, not lawn sand.
  • Carry out any repair work.

November

  • Mow once, provided weather is not frosty or wet.
  • All equipment cleaned and oiled for winter storage.
  • Keep lawn clear of fallen leaves.
  • Turfing carried out where necessary.

December

  • Keep off the lawn when frozen and wet.
  • Turfing possible during fine weather.

4.4 Describe plant alternatives to grass for lawn areas

  • Chamaemelum nobile (camomile)
  • Cotula
  • Dichondra micrantha

Disadvantages – these are ground-cover plants and do not stand up to heavy, continual wear, so they are rarely the best choice for a main lawn; they may, however, be used for primarily ornamental areas.

Areas for planting – Grow them in a patio or courtyard garden to provide a patch of green; as a living surround at the base of a fountain, raised pond, pedestal urn, or statue; or next to a patio or path to creep over the edges and relieve the rigidity of the hard surface.

Chamaemelum –  leaves release a sweet, apple-like fragrance when crushed but they do not tolerate heavy wear; the non-flowering clone “Treneague‟ is naturally low-growing and especially suitable for lawns.

Cotula, which has fern-like leaves, is considerably more hard-wearing as it forms a thick carpet of creeping stems. It also flourishes in moist conditions.

Dichondra grows most successfully in warm areas and does not survive temperatures below -4ºC.

Tapestry lawn – a patchwork effect by growing a number of low, mat-forming plants together. It is best to use plants that grow at a similar rate, like creeping thymes, eg  Thymus caespititius, T. Coccineus Group, T. ‘Doone Valley’, T. polytrichus subsp. britannicus.

Japanese style moss lawn – won’t tolerate hard wear, but doesn’t require mowing, fertiliser or much maintenance. Best in a shady spot. Good in acidic soil. Use Hypnum, often called sheet moss, or Thuidium, referred to as fern moss. Plant in spring after the last frost, preferably after trees leaf out. Press chunks of moss firmly onto the surface of moistened soil. Lightly water the moss daily for at least 3 weeks. Depending on the growing conditions and the spacing of moss chunks, the moss lawn may take a year or more to fill in. In the meantime, keep bare spots weeded.

Hedera helix– good cover for shade.

Clover – Trifolium repens, green, good on poor soils, nitrogen fixer, often considered in USA and Australia as an alternative and there has been research here into non-flowering strains for lawn replacement . Sow seeds in spring. Keep moist until germination.

Stonecrop (Sedum spp.). The genus Sedum includes many creeping species, some hardyand others tender. Some have attractive flowers, for example S. spurium ‘Dragon’s Blood. Sedums of all types root easily but can get damaged underfoot.


RHS Level 3 Planning, Construction and Planting – UNDERSTANDING SURVEY TECHNIQUES AND GARDEN PRINCIPLES

  1. Understand the historical development of garden design styles.

    1.1 Describe representative characteristics of the following garden design styles: Moghul, Moorish, Medieval, Renaissance (Italian, French and Dutch), English Landscape, Victorian, Edwardian, Japanese, Modernist, Contemporary.

DATES

STYLE

EXAMPLES

MOGHUL

(Afghanistan, Pakistan, India)

 C 16-19th

Formal, symmetrical, water – channels and pools, terraces, avenues of Cyprus, scented flowers. 4 types: palace, tomb, waterfront and terrace.

Taj Mahal, Agra

MOORISH

(Spain, Portugal, S. Italy, France)

 C 8-15th

Water and shade used to cool gardens. Gardens divided into four. Fountains and ponds, ceramic tiles, carved stones, hedges, containers, fragrant flowers. Cyprus, Sycamore and Citrus.

Maria Luisa Park, Seville

 MEDIEVAL

 C 12-15th

 Food production – orchards, herbs, medicines and vegetables. Walls, fragrance, wells, turf seats, arbours, grassed dancing, mounts to view. Pleached limes.

Alfriston Clergy House

 ITALIAN RENAISSANCE

 C15-16th

Parterres. Dramatic views, spectacular fountains and cascades, woodland, orchards, herbs, levels. Inspired by Romans and ancient mythology.

Villa Lante

FRENCH RENAISSANCE

 C15-17th

Parterres. Acute angles, ornate statuary, fountains, rigid symmetry, canals, views, focal points and cascades at the end of every vista. Terraces and grottoes.

Luxembourg Gardens

DUTCH RENAISSANCE

 C15-17th

Parterres. Rectangular spaces divided to squares, leafy walks, arbours, fountains, mazes, bulbs. Buxus hedges. Helianthus, Papaver and Rosa.

ENGLISH LANDSCAPE

 1720-80

Idealised version of nature, inspired by paintings. Classical. Lakes, rolling lawn, grove of trees, temples, Gothic ruins.

William Kent, Lancelot Capability Brown

VICTORIAN

 1837-1901

Glasshouses and conservatories leading to overwintered tender plants. Carpet bedding, new plants from abroad – Dahlia, Aster, Impomea, Zinnia. rockeries, parterres, arboretum.

Sir Joseph Paxton, Cragside, Northumberland

EDWARDIAN

 1901-1910

Hedges, Terraces, sunken, pergolas, cottage garden styles

William Robinson, Lutyens +Gertrude Jekyll, Reginald Bloomfeld

JAPANESE

 600AD

Borrowed scenes, asymmetry, moss gardens, bonsai, miniature landscapes, fish, cloud pruning

Nanzen-ji

MODERNIST

 1800  popular 1930

Water, geometric, asymmetry, crisp + clean, planting in one part. large horizontal landscaping – stone, wood, concrete, cement, plastic.

CONTEMPORARY

Last ten years

Grasses, sunken LED lighting, simple, bold, architectural planting, repetition of plants, hard landscaping innovative and central to design, natural looking materials eg distressed metals, stone, sustainable materials.

Difference between Modernist and contemporary styles

Firstly, Modernism is a specific movement that started in the 1800s whereas contemporary is simply what is happening now. Modernism occurred at a time of the Industrial Revolution when form followed function – how well it worked mattered more than how it looked. As a result the garden style was simple with no fancy details. Contemporary tends to use a similar ethos (simplicity, functionality) but it also tends to reflect our recent interest in sustainability using recycled materials more. Plus it is influenced by our desire for more natural looking settings, so functional metal is a common material for both Modernist and contemporary, but distressed metal looks more natural and so features only in contemporary. Recent advances in LED lighting are also made use of in contemporary styles. Contemporary gardens often follow current fashions such as willow fencing, decking or insect habitat boxes.

  1.  Understand how to conduct a site appraisal and interpret the results

    2.1 State the main factors to be assessed for an overall site appraisal.

    2.2 Review the advantages and limitations which site factors may impose on garden planning and layout, to include accessibility for disabled users.

Information about the site to be collected at site appraisal and advantages and limitations:

Microclimate – caused by walls, buildings and plants altering the climate over a tiny area. Can provide planting opportunities (eg tender planting in sheltered corners) or planting restrictions (limited planting possible at the base of a Taxus hedge). Hard landscaping is also affected by microclimate (eg moss and algae forming on decking in shady areas).

Orientation – The direction the garden faces in affecting sun, shade and wind  (north=cold and shady, south=warm and sunny) in turn affecting the positioning of features (walls shouldn’t block sun, patios may need shade/sun) and plants (shade loving, tender plants needing specific aspect). Similar to microclimate.

Access – to garden from road, from house to garden and around garden. Relevant for both work in the garden and garden users. Disabled users – question whether existing hard landscaping is safe and convenient for use, whether ramps, handrails and so on are adequate. Children – are there safety risks, such as ponds? For gardeners and landscapers – will work be limited or more costly due to difficult access?

Climate – the long term weather patterns of an area,  includes prevailing wind (from somewhere warm or cold), temperature (varies according to urban/rural setting, closeness to sea and topography) and average rainfall. Both plants and features are affected by climate . Similar to orientation and microclimate, important to think about what plants will thrive best, what hard landscaping materials will need the least maintenance in that climate and about how the garden owners will want to enjoy the garden – eg a cold, wet climate is not ideal for an outdoor swimming pool.

Contours – the varying heights within a garden. Levelling may be necessary for patios or to get rid of frost pockets. Drainage and erosion may be a problem. Levels can add interest. (see next blog for information about how to ascertain levels). Disabled users may have particular problems with slopes or stairs. Steep slopes can limit building access and maintenance (eg lawnmowers struggle with slopes). Sunken areas and steps can create views and interest.

Existing features – their condition, what needs to be kept, existing colour scheme and style. See access. Particular features may be used to build a design style around – for example a beautiful Victorian wall can inspire a Victorian garden.

Services – drains, electricity, water pipes. Overhead and underground services to be recorded. Overhead power lines may restrict use of machinery, underground pipes may be a problem when laying drainage or building swimming pools.

Soil – pH, textures, structure, top soil depth, soil pans, drainage, nutrients, rubble and contamination content. Planting might be limited eg only calcifuges or bog plants. Topsoil may need to be imported.

Existing vegetation – their condition and interest, privacy and wildlife to be considered, Tree Preservation Orders. With TPOs it may not be possible to cut down a large, imposing tree, birds nesting may limit timing of hedge cutting/removal. For disabled users – consider whether soft landscaping is easy to care for, for children – whether existing plants are harmful – if ingested, toxic sap (eg Euphorbia)

Dimensions – size and shape of the garden affects types of features and plants used. Designing for awkward shapes can lead to innovative use of hard/soft landscaping. Size and shape of garden affect design (eg a narrow garden may use diagonal patterns, lawn size and hard landscaping to increase feeling of width, a small garden needs hard and soft landscaping in proportion to the garden size, a large garden can be divided into different ‘rooms’ and styles). Opportunity to use unusual shapes to create interest or use landscaping to make an uninteresting shape more unusual.

Legislation – TPOs, conservation areas, planning regulations, boundaries (height of walls etc), Hedgerow Regulations all can restrict what change are possible. See existing vegetation.

Exposure – how much a garden is open to the elements and affected by wind or salt in coastal gardens. Relevant to plant selection (certain plants survive better in exposed areas) and seating (people don’t usually want to sit in a high wind). Wind breaks (hedges or walls) can be put into design. In a sheltered garden tender plants may be grown and in an exposed garden hardy plants will be needed.

Altitude – affects the range of plants grown, higher altitude=low temperature and more exposed. See Exposure.

Views – what surrounds the garden. Borrowed views can be used to create a larger garden or it may be necessary to hide ugly views by screening.

External factors – includes views, causes of microclimate (eg large buildings = shade), wildlife. See views, climate, legislation and microclimate.

  1. Know how to develop a client brief

    3.1 Identify the information which needs to be gathered from the client, to include: likes and dislikes, aspirations, functional requirements (e.g. utility, play area for children, restricted mobility), ornamentation, relaxation, entertaining or food production, degree of maintenance and budget.

Questions that can be asked to clients (taken from a number of client questionnaires on the internet, garden design websites are good for this).

What are your personal preferences?

  • What do you like and dislike about your garden?
  • What colours do you like?
  • Any specific styles you like (eg Alpine or formal)?
  • Any specific plants you would like?

What mood would you like for your garden (mark all appropriate)?

  • Calming
  • Private
  • Fragrant
  • Colourful
  • Tropical
  • Practical
  • Wild

What do you use your garden for?

  • Do you like entertaining?
  • Have any sports hobbies (football, swimming)?
  • What time of the year will you most use your garden?
  • What time of day?

Which features would you like (mark all appropriate)?

  • Water feature
  • Vegetable patch
  • Fruit
  • Herbs
  • BBQ
  • Lighting
  • Children’s play area
  • Parking
  • Compost

Do you like gardening?

  • How much time will you be able to spend on the garden a week?
  • Will you be hiring a gardener?
  • Any specific jobs you hate (eg Mowing the lawn, raking leaves)?

Who is the garden for?

  • Do you have children or pets?
  • Anyone with any disabilities or special needs to use the garden?

Are there any specific problems you would like solved (mark all appropriate)?

  • Bad drainage
  • Lack of privacy
  • Noise
  • Unpleasant views
  • Pests (badgers, rats and rabbits)

What is your budget?

3.2 Describe how to record relevant data using a client questionnaire, audio and visual methods.

Collect information from client by:

  • Using a questionnaire (may be online or in person)
  • Email
  • Using a digital audio recorder
  • Taking photographs (if an iPad is used, redesigning can be put straight onto a photograph)
  • Sketches

This leads to a Concept Plan that shows problems and applies solutions. In addition to this the site appraisal provides information on the dimensions and details of the garden which is used to draw up the various design plans.

4. Know a range of basic survey techniques

4.1 Describe the linear surveying of a site using appropriate equipment to include tapes and automatic levels.

Definitions

  • Linear surveying – Measuring distances between points on parts of the earth’s surface. In a garden survey this would include measuring the size and shape of hard landscaping (eg walls and fences), boundaries and plants (eg trees) that are to be kept in the design.
  • Datum – line or level surface to which all heights are referred.
  • Reduced level – level above or below the datum point.
  • Line of collimation – line of sight horizontal to the ground.

Equipment

  • Tapes – measuring tapes. Lots of clear info here – Linear Measurements – civil engineering site.
  • Automatic levels – a device mounted on a tripod used to measure levels. Used with a staff.
  • Dumpy level – similar to automatic level, slightly different mechanism Wikipedia page.
  • Theodolite – a precision instrument for measuring angles in horizontal and vertical planes.
  • Electronic distance measurement device (EDM) – a hand tool that accurately measures distance by sending a pulse of light to a surface.

Methods

  • Triangulation – using two known points to determine the position of a third, unknown point by measuring the angles and distance.
  • Trilateration – using the geometry of circles, squares and triangles to determine, record and map the position of features.
  • Offsets – marking the position of a number of features, measured from a straight line (a measuring tape).
  • Clock method – mark central point and walk round in a circle recording features.
  • 3:4:5 Triangle – used to find a right angle, useful for measuring, especially offsets. Beautifully simple explanation here.

Excellent website for how to conduct a linear survey, how to set up levels and how to produce contours and longitudinal sections here – Survey your garden.

 4.2 Describe the surveying of a site to record variation in levels using automatic level and staff.

Websites

4.3 Interpret survey measurements from standard documentation.

4.4 Produce scale drawings using survey data, including the correct use of graphic symbols, scale and nomenclature.

Types of Plan

Designer’s Plans

  • Location plan (marking where site is on a map)
  • Zone map (shows soil type, microclimate etc)
  • Site survey
  • Concept plan (shows problems and solutions)

Plans for Client

  • Sketch design
  • Final design
  • Sketches, elevations and perspective drawings

Plans for Construction

  • Construction details
  • Hard works layout plan (BSI graphics, structures and levels)
  • Services
  • Planting plan
  • Setting out plan (dimensions, measurements and offsets)

Equipment

  • Scale ruler
  • HB and 2H pencils
  • Eraser
  • French curves
  • Compass
  • Drafting pen

Websites

How to Draw a Garden Plan (part 2)

Two websites from which you can download (for free) garden design symbols, or just see the symbols and get an idea of what there is:

5. Understand how site characteristics may influence garden design 

5.1 Explain the influence of the following on a choice of design : altitude, orientation, aspect, changes in level, pollution, soil type, soil depth, soil pH, soil water content, views, screening, degree of exposure or shade, microclimate.

5.2 Explain how a given design may be used to enhance the attributes and offset the limitations imposed by the site.

(note: these questions cross over with 2.1 and 2.2 covered in the previous blog, however, I’ve elaborated on them here.)

Altitude

Problems with high altitude:

  • Much shorter growing season.
  • May have midsummer hail and frost.
  • Intense sun, high winds and drought.
  • Rocky alkaline soils or forest-shaded acidic soils.
  • May be nutrient deficiency due to leaching.
  • Heat is slower to build and quicker to dissipate.

Solutions to problems:

  • Alpine plants
  • Terracing
  • Mulching with organic matter to improve soil

Orientation

Design adaptations for South facing gardens (sunny):

  • Sun loving plants – Mediterranean or succulent – styles led by planting
  • Pale hard landscaping
  • Providing shaded areas for seating
  • Irrigation for plants
  • Water features can provide sense of cool

Design adaptations for North facing gardens (shady):

  • Shade loving plants
  • Problems with growing grass – keep lawns small or use a moss lawn
  • Algae forms on decking in the shade, use brick or stone
  • Use mirrors and reflective surfaces to increase light
  • Use pale flowers and bright colours
  • Position seated areas to make the most of the sun
  • Avoid shading more areas with large trees or high walls

East facing gardens have early morning sun that can cause frost damage on some plants, to avoid this, position variegated or tender plants carefully to avoid early morning sun. Camellias are especially susceptible.

Aspect

Note: Orientation and aspect are often considered to be the same thing, but aspect can also include shade and shelter (eg a sheltered aspect). Sheltered gardens often suffer from shade, this is covered under North facing gardens above.

Changes in Level

Ways to use existing levels or create changes in level:

  • Steps
  • Sunken areas
  • Raised beds
  • Sunken paths surrounded by walled beds
  • Mediterranean style gardens with split level patios.
  • Tiered multilevel gardens
  • Rockeries
  • Waterfalls

Problems with slopes, solutions:

Pollution

Different types of pollution and solutions:

  • Rain – a rain garden – a planted depression that absorbs water and allows it to flow into the ground rather than storm drains.
  • Noise – walls and thick growing trees or shrubs block sound, running water features and wind chimes cover sound.

Soil Type

Factors to consider and solutions:

  • Soil texture – eg sandy or clay. Affects what plants can be grown and what kind of drainage can be used. Clay soils may benefit from raised beds, sandy from incorporated organic matter.
  • Soil structure – improved by adding organic matter, maybe add a compost bin to a garden with bad soil structure.
  • Topsoil depth – plant choice is limited by shallow soils. Raised beds can solve this.

Soil pH

Acid loving plants – Camellia, Calluna, Kalmia, Erica, Cornus, Acer, Abies

Alkaline loving plants – Geranium, Aucuba, Lavandula, Delphinium, Crataegus

Note: outcome 3 of unit 2 will cover plants for situations more fully

Soil water content

  • Make use of wet gardens with bog plants or ponds
  • Make use of dry gardens with succulents
  • Solve drainage problems with a swale, pipe drainage or a soakaway
  • Solve irrigation problems with a leaky hose

Views

Borrow views from neighbouring gardens and landscapes, creating a connection between plants inside and outside the garden. Hide ugly views with screening – fences, climbers, trees; or distractions – brightly coloured foliage or landscaping that draw the eye.

Screening and exposure

Types of screening:

  • Hedging – Taxus baccata, Ilex aquifolium, Ligustrum ovafolium
  • Evergreen climbers – Trachelospermum jasminoides and Clematis armandii
  • Walls – brick, cement blocks and dry stone walls
  • Fences – woven willow, featherboard and panel fencing
  • Trees – Arbutus unedo and Eucalyptus gunnii

Exposed gardens, problems and solutions:

  • Plants exposed to the elements (harsh winds, sea spray) – hardy plants, thick hedges, walls.
  • Soil erosion – see Changes in Level.

Microclimate

This is linked with aspect and orientation. A garden can contain many subtle (or not so subtle) differences in moisture, shade and shelter and so solutions to those types of climates can also apply on a small scale to the microclimates in a garden.

6. Understand the principles and elements of design

6.1 Explain the principles and elements of design: to include movement, rhythm, scale balance, form, texture, space, colour , proportion, harmony, unity, symmetry, and asymmetry, focal point, borrowed landscape.

6.2 Describe examples of the application of the elements in 6.1 to the design process.

Movement

How the eye moves around the garden, some shapes, patterns, paths and lines create movement. Also physical movement – water, plants.

  • Curves create gentle, restful movement
  • Angles give a sense of restlessness
  • An off-centre focal point can create a sense of movement and dynamism, and invites curiosity
  • See also Form
  • Water in water feature is constantly moving
  • Grasses move in the wind

An article about rhythm and movement

Example: A curving, winding path edged with long grasses (Miscanthus sinensis) would create a soothing, but constant sense of movement. See Piet Oudolf designs.

Rhythm

Using repetition to connect areas of the garden and create unity, also connected to movement, since rhythm is found in the pattern of visual movement.

  • Repeated features – flower colours, hard landscaping, clipped topiary
  • Repeated styles – sweeping lines, geometric patterns, interlocking features
  • Repeated colours – pastels, primary colours, contrasting colours, deep reds and grey foliage

Example: A set of three, large, terracotta pots on a wall filled with identical purple Lavandula angustifolia ‘Hidcote’ bushes, edged with black Ophiopogon planiscapus ‘Nigrescens’. This purple and black colour combination can also be used elsewhere in the garden and the terracotta colour can be repeated in red brickwork.

Scale

Scale refers to the size of the garden in comparison to non–garden objects (as oppposed to Proportion which refers to the size of garden components in comparison with each other), for example:

  • Size of humans in relation to garden (eg paths)
  • Size of garden in relation to house
  • Size of surroundings (eg trees and buildings outside the garden) in relation to garden

Example: A garden surrounded by a wood with large trees needs at least one large tree inside the garden to give a sense of scale. For example an oak woodland would benefit from three Quercus robur inside the garden, spaced to connect the whole garden with the view.

Balance

Balance is an even distribution of visual weight – weight created by colour, colour brightness, landscaping or plant size. Balance is like a very loose symmetry, for symmetry if there is a statue on one side of the garden there should be a statue on the other, whereas a statue in one part of the garden can be balanced with a pergola in another part.

  • No single object should dominate excessively

Example: Three Acer palmatum ‘Bloodgood’s ( that turn bright red in the autumn) are spaced apart on one side of the garden, and can be balanced with a single, larger Cotinus coggygria ‘Royal Purple’, (that also turns red in the autumn) on the other side of the garden.

Form

Form is the habit and shape of plants, different plant shapes create interest, harmony and/or movement

  • Fastigiate form creates dynamic effect.
  • Combine shapes, eg transparent sprays in front of solid colour, weeping shapes with upright.
  • Forms – fastigiate, weeping, columnar, oval, round, spreading, pyramidal.

Example: Closely pruned Buxus domes contrast with upright Euphorbias and sprays of fine textured grasses (see below). There is enough enough interest to make this an enjoyable garden to look at, but enough repetition to unify the garden.

Telegraph Garden at Chelsea

Telegraph Garden at Chelsea

Texture

Texture is determined by leaf size, by light reflected from leaf surface or by comparative detail on hard landscaping. Combined with colour and form, plants can be put together in a way that is striking or subtle. Most designs will use a combination of striking accents in a subtle whole – all subtle can be dull, all striking is exhausting.

  • Light filtering translucence of thin leaves contrasts with reflected light of small leathery leaves.
  • Textures can be fine (small leaves eg Buxus sempervirens), medium or coarse (large leaves, eg Musa basjoo).
  • Mixing textures creates interest, however it’s not good to position fine with coarse, instead use fine with medium, medium with coarse.

Example: (see below) The large variegated leaves of Hosta with smaller, divided, purple leaves of Heuchera.

Chelsea Flow Show

Chelsea Flow Show

Example: Spiky Eryngium giganteum with soft Salvia argentea and fine Stipa (picture).

Space

Space can refer generally to the area to be designed or more specifically to how open an area is.

  • Balancing privacy and shelter with a more open sense of space.
  • Using partially visible areas to create interest– Hahas, large circular holes in walls, hedges, walls.
  • Restraint – reveal a little at a time – eg series of focal points gradually revealed.
  • Different heights can be blocked from view – using hedges or a canopy of trees.

Colour

  • Reds and orange brings warmth and vitality
  • Blues pinks and whites are subdued and cooling, add depth
  • Colours can be used to bring unity – repeating certain colours in hard landscaping and planting
  • Green is used as a foil in garden design, a neutral colour
  • Too much colour variety can be exhausting
  • Use different seasons to explore different colour palettes

ColoursExample: A herbaceous bed at Kew Gardens (see below) uses harmonious colours, reds to yellows.

Kew Gardens

Kew Gardens

Proportion

Proportion refers to the relative size of parts within a whole, how the size of garden components relate to one another.

  • The divine proportion (golden ratio) is 1:1.618, using this as width to length is satisfying to look at.
  • Have a third hard landscaping to two thirds of soft (some styles do not follow this).

Example: Every design on this site shows very pleasing proportion; paths, pots, hedges and plants all fit together in a satisfying way where no part feels out of place or wrongly sized.

Harmony

This incorporates balance and unity throughout a design so that all parts of the landscape are adapted to one another, forming an agreeable whole.

  • May be colour harmony – using colours that work well together, either complimenting or contrasting.
  • Harmony does not need to be safe and conventional : unconventional, innovative designs can still be harmonious.

Example: Using a limited colour palette, such as burgundy and whites (see below), the fluid planting, and rock and cobble stone hard landscaping create a harmonious whole.

Vital Earth Nightsky at Chelsea

Vital Earth Nightsky at Chelsea

Unity

A thread or theme running through the garden that connects everything together. May be:

  • Colour (see colour, can be in both hard and soft landscaping)
  • Period of history (eg Victorian, Landscape)
  • Style (eg Mediterranean, Japanese)
  • Repeated hard or soft landscaping (eg Buxus hedging)

Symmetry and Asymmetry

The use of mirror image with identical hard/soft landscaping either side of an imaginary line (or not identical for asymmetry).

  • An asymmetrical design can use the golden ratio to establish balance.
  • Symmetrical designs use parterres (four way symmetry).
  • Bilateral symmetry – mirror image split down the middle, eg fastigiate Populus nigra and domed Buxus in a pattern of bilateral symmetry or a Buxus parterre.
  • Radial symmetry – like a wheel with spokes.
  • Approximate symmetry – similar objects and shapes either side of a line, not exact, varying in pattern etc.

Focal Point

An object of interest that draws the eye

  • Water features
  • Statues
  • An architectural plant
  • Hard landscaping
  • It’s important not to over use focal points so a garden becomes cluttered.
  • Remember balance when positioning them (or use symmetry).
  • Focal points work well when partially seen, at the end of a journey through the garden, or when partially obscured to create interest.
Water Feature Focal Point

Water Feature Focal Point

Statue Focal Points by David Meredith

Statue Focal Points by David Meredith

Some more examples of focal points here  and here.

Borrowed Landscape

Using an attractive view or plant (usually a tree) outside the garden. This can be done by:

A couple of very good books that define and describe concepts such as unity and harmony, and talk about plant combinations, using texture, colour and form: